Native Guide
Covering everything you need to know about the native app store setup and submission process.
- Platform options comparison
- Web, Portal app and Standalone Native: What's the difference?
- Web vs native comparison
- Hybrid or virtual platform vs Event app (in-person only) platform
- Native Submission Guide
- Important Native Information
- Creating Your Developer Accounts
- Granting CrowdComms Access to Your Accounts
- Granting CrowdComms Access to Just a Single App
- App Submission Details
- Native Build Guide (Staff Only)
Platform options comparison
Web, Portal app and Standalone Native: What's the difference?
Overview
The CrowdComms platform can be accessed as both a web based platform via a custom URL or by downloading a native / traditional app from the Apple app store and Google Play store. Work is involved with making the platform available as a native app and there are approval processes which require extra lead time. You can read the full process here
Web
The CrowdComms platform is available as a web based solution as standard. On first setup, you will be able to open the platform in its current format using the web link available in the admin CMS. This url can be customised to ensure you have a branded link for users to access via.
The web based solution is responsive and works across devices including desktop, tablets and mobiles ensuring your users have consistent experience and full access to functionality regardless of the way they choose to access the platform.
Benefits:
- No download, quick and easy to access.
- Included as standard and available from initial platform launch to approved users or only admins initially. Custom url can take up to 48hours to setup.
- Responsive platform ensuring users can access across range of devices and browsers without compromising experience - Read more
- Can be saved as icon on mobile phone home screens. Steps to do so differ device to device - Read external guide
Negatives:
- No app store presence.
- Push notifications aren't included. You can still send in platform notifications and email notifications to ensure users receive important information - Read more

Portal App
In the event technology world, this goes by a number of names: portal; container; housing app. At CrowdComms we call this a portal app.
The portal app can "house" multiple events or platform projects over time, with new events being added to the existing portal. You have one generic branded portal app to house all of your events. The standard approach is to brand the portal in line with you overall company brand for example 'CrowdComms Events' would be branded in line with https://www.crowdcomms.com/ and all the events housed within this portal organised by CrowdComms would have their own specific branding ensuring once users land on the specific event view, its a branded event experience.
Benefits:
- One time submission to the app stores saving lead time for future events (Some critical updates require a resubmission which we manage for you).
- One app saved on users devices to access all future events. No need to download a new app for each event.
- Consistent user experience ensuring users get comfortable with accessing the platform for future events helping to achieve high adoption rates for all events.
- Personalised view of events. Users only see the events you give them access to.
- Users have quick access too upcoming, past and featured events.
- Send targeted push notifications to users assigned to specific events or groups.
- Each of the events or projects included within the portal can be branded differently.
Negatives:
- The portal app name, icon and splash screen will be the same for all users meaning this isn't specific to any one event. Events within the portal will be branded specific to the event(s).
- Initial submission typically takes up to three (3) weeks for Apple to approve. Google Play is usually quicker. Read more
- There is an additional cost to submit a portal app whereas the web version is included with all packages.
- Resubmissions to update the portal app name, app icon or splash screen require a resubmission which includes native submission cost.
- Resubmissions to add new features or make critical updates may result in short periods of there being a different feature set in the web platform and native portal app. This is rare and we manage this for you to limit any impact. Most new features and updates are automatically added to native apps without requiring a resubmission.

Standalone native app
This option provides you with a custom app name, app icon and splash screen that users can search and download from the Apple app store and Google Play store. For high profile events it may be a priority to ensure users can search for the event name in the app stores and download an app listed and branded with the events specific branding rather than the company branding as with the portal option. If this is the case the standalone native app is the way to go.
Benefits:
- Custom app name, app icon and splash screen image giving users an event specific branded journey from beginning to end.
- Send targeted push notifications to all users or specific groups.
Negatives:
- Initial submission typically takes up to three (3) weeks for Apple to approve. Google Play is usually quicker. Read more
- There is an additional cost to submit a standalone native app whereas the web version is included with all packages. Each event you opt for standalone native app will incur this cost again whereas portal app is a one-off annual cost to submit to the app stores.
- Resubmissions to update the app name, app icon or splash screen require a resubmission which includes native submission cost.
- Once the event finishes, users often delete the app from their phones making it difficult to promote future events or continue the event conversation.
- Resubmissions to add new features or make critical updates may result in short periods of there being a different feature set in the web platform and native portal app. This is rare and we manage this for you to limit any impact. Most new features and updates are automatically added to native apps without requiring a resubmission.
CrowdComms Container App
If you do not have time or budget to go with a custom branded native app, our CrowdComms container app is always available to use.
This provides the same benefits of a branded native app including push notificiations, however instead of seraching for your app name, attendees will download the CrowdComms container app and enter your event code to access.
The limitation is the app icon will be CrowdComms and there will be no branded splash screen on first load.
- Download from Apple
- Download from Google Play
- Searchable by "CrowdComms App"
- Example event code to see a live demo "virtual"

Our recommendation
Virtual Events and webinars: Web based platform is usually the best option. Simple to setup and easy for all users to access regardless of the device.
Hybrid and physical events: Web based platform promoted alongside a portal app. The portal app is by no means essential however if you have users on route to your venue or manoeuvring between sessions, exhibitors etc, a native app with information specific to the physical event and push notifications for on going communications is beneficial. The web based solution is widely used pre and post event and should always be communicated along side the native portal app to give users the option to choose their preferred method of access.
Web vs native comparison
The primary difference between the web based version and native app is how users access the platform. The web based version is accessible via a custom URL whereas the native app is downloaded from the Apple app store or Google Play Store.
A major benefit of the CrowdComms platform is that the interface is identical across the web and native version and there is one admin dashboard to upload and edit content. There is no duplication of work and the user experience is consistent regardless of users preferred method of access. This ensure users who access the platform on desktops pre event are comfortable with the user interface when they download the native app for access onsite at in person events. This is essential for hybrid events to allow your remote audience accessing the desktop version to have the same experience as the in person audience on mobile phones.
There are subtle differences in terms of the features available. A notable difference is push notifications which is a feature of native apps and therefore not available on the web based version. If you opt to stick with web which many clients do for ease and due to the consistent user experience, you still have the ability to send pop up alerts in platform and email alerts to ensure your attendees are up to speed with the latest information.
| Feature(s) | Web based | Native add on (Same platform accessed via app stores) |
| Customisation | Yes | Yes |
| Custom URL | Yes | No |
| Security Settings | Yes | Yes |
| Push Notifications | No | Yes |
| In Platform email alerts and notifications | Yes | Yes |
| App store listing with custom app name and branding | No | Yes |
| Agenda | Yes | Yes |
| Session video player with engagement panel |
Yes with Virtual / Hybrid platform. No with Event app for in person only event. |
Yes with Virtual / Hybrid platform. No with Event app for in person only event. |
| Stream hosting | Yes with Virtual / Hybrid platform.
No with Event app for in person only event. |
Yes with Virtual / Hybrid platform. No with Event app for in person only event. |
| Video player | Yes | Yes |
| Personalised schedules | Yes | Yes |
| Round table discussion rooms | Yes | No |
| Zoom breakout integration | Yes | Yes |
| Speaker profiles | Yes | Yes |
| Attendee profiles | Yes | Yes |
| 1-2-1 private chat messaging | Yes | Yes |
| 1-2-1 private video calls | Yes | No |
| Company profiles | Yes | Yes |
| Sponsor opportunities | Yes | Yes |
| Event information | Yes | Yes |
| Floor plans | Yes | Yes |
| Google maps | Yes | Yes |
| Documents | Yes | Yes |
| Social media | Yes | Yes |
| Activity feed / social wall | Yes | Yes |
| Live polling | Yes | Yes |
| Q&A | Yes | Yes |
| Session feedback |
Yes |
Yes |
| Surveys | Yes | Yes |
| Gamification | Yes | Yes |
| Analytics and reporting | Yes | Yes |
Hybrid or virtual platform vs Event app (in-person only) platform
The platform itself is the same and built using the same admin dashboard. The primary difference in feature set is that the hybrid / virtual platform comes with the session video player with engagement interface to allow remote audience to participate in real time with streamed sessions. Hosting for the live streams is also supported for this version of the platform.
Live stream engagement interface: Available on the virtual and hybrid platform

The in person platform comes at a lower price point due to the support and running costs being lower for an in person platform where data costs related to hosting a stream are removed.
| Feature(s) | Hybrid / Virtual Platform (Web based) | Event App, In-Person Platform (Web based) |
| Customisation | Yes | Yes |
| Custom URL | Yes | Yes |
| Security Settings | Yes | Yes |
| Push Notifications | No, available if you include native submission in your package | No, available if you include native submission in your package |
| In Platform email alerts and notifications | Yes | Yes |
| App store listing with custom app name and branding | No, available if you include native submission in your package | No, available if you include native submission in your package |
| Agenda | Yes | Yes |
| Session video player with engagement panel | Yes | No, only included with the hybrid / virtual platform package |
| Stream hosting | Yes | No, only included with the hybrid / virtual platform package |
| Personalised schedules | Yes | Yes |
| Round table discussion rooms | Yes | No, only included with the hybrid / virtual platform package |
| Zoom breakout integration | Yes | Yes |
| Speaker profiles | Yes | Yes |
| Attendee profiles | Yes | Yes |
| 1-2-1 private chat messaging | Yes | Yes |
| 1-2-1 private video calls | Yes | No, only included with the hybrid / virtual platform package |
| Company profiles | Yes | Yes |
| Sponsor opportunities | Yes | Yes |
| Event information | Yes | Yes |
| Floor plans | Yes | Yes |
| Google maps | Yes | Yes |
| Documents | Yes | Yes |
| Social media | Yes | Yes |
| Activity feed / social wall | Yes | Yes |
| Live polling | Yes | Yes |
| Q&A | Yes | Yes |
| Session feedback |
Yes |
Yes |
| Surveys | Yes | Yes |
| Gamification | Yes | Yes |
| Analytics and reporting | Yes | Yes |
Native Submission Guide
Important Native Information
Please Note: A Branded Native App is an optional add-on and may not be included in your app package. If you're unsure whether a Native App is included in your package, please refer to your invoice or contact your Account Manager.
For app packages without a Branded Native App, you can still benefit from the native experience by using our Native CrowdComms Container app. For more information, please contact your App Support Specialist.
IMPORTANT - Resubmissions resulting from requiring app imagery or descriptions to be changed after sign-off will incur a Resubmission Fee of £1200 exc vat. Please ensure images and descriptions are correct to avoid this. Changes to branding and content on the app will not require a resubmission.
Before you begin the native process, there are some important things you must be aware of.
Your Developer Accounts Must Match your App's Brand
It's very important that the Apple and Google Developer Accounts which we submit your app into both match the brand of your app. Here's a rejection message we receive when the Developer Accounts don't match the brand of the app:
We noticed that your app appears to be created from an app generation service or a commercialized template, but it was not directly submitted by the owner or provider of the business, brand, or service. - Apple
For example, if your event is Acme's Annual Conference, the developer accounts used to submit the app should be Acme's developer accounts, rather than Pinnacle Event Agency's developer accounts.
🕒 Timeframe: Creating new Developer Accounts
You must allow 1 week to setup new Apple or Google developer accounts if you don't already have them. Apple checks each new organisation's developer account and approves them manually. If you need to apply for a "D-U-N-S Number" for your organisation, this can take additional time.
You must allow 3 weeks between giving us access to your developer accounts and the app being approved in the stores.
Requirements To Create New Developer Accounts
✅ Company / Organisation Developer Accounts
When signing up for new Apple and Google developer accounts, it's important to choose the Company / Organisation type, rather than sole trader or individual. An Individual / Sole Proprietor / Single Personal Business account will not be able to grant access to a third party, which is necessary for us to submit apps on your behalf.
✅ Apple ID & iOS or Mac Device
In order to sign up for an Apple Developer Account, you need an Apple ID with Two Factor Authentication enabled. In order to setup Two Factor Authentication, you need access to an Apple iOS or Mac device.
Our suggestion for the smoothest way to setup an Apple Device with Two Factor Authentication is to use a Mac (rather than iOS device) and create a new user account on the Mac purely for this. This will give you the opportunity to log out of this user account once the Apple Developer account is setup, without disrupting any existing personal Apple ID or iCloud accounts on the Mac.
(An iOS device can only have one user account and therefore one iCloud account linked to it, which is why a Mac may be less disruptive.)
Two-Factor Authentication is not the same as Two-Step Verification
Apple has a help article explaining the difference which you can read here. In short, in Apple's ecosystem, two-step verification is when Apple sends a text message or email to a phone number or address which they have on file for you. Two-Factor authentication requires an Apple device which is signed into iCloud using the Apple ID which is being used for the Apple Developer Account.
Apple assumes Two-Factor Authentication is more secure than Two-Step Verification because they control the security of Apple devices, whereas the email or phone network providers are outside of their control.
✅ D-U-N-S Number
A D-U-N-S number is a requirement of Apple during the enrolment process. If you have a D-U-N-S number, you are ready to continue. If you are unsure, you can use this easy look-up tool logging in with an Apple ID. If your organisation does not have a D-U-N-S, you can register for one here - as a note, this can take between 5-10 business days to receive.
Our guide for creating Apple Developer Accounts can be read by clicking here.
Final Steps Before We Submit
Once you've got on-brand, Company / Organisation Developer accounts setup,
✅ Invite CrowdComms to Your Accounts
✅ Approve App Submission Details
Even when you've created Apple and Google developer accounts which match the brand of your app, and have given us access to those accounts, we still need you to sign off certain app content and design assets which can't be changed after we submit the app without a resubmission.
IMPORTANT - Resubmissions resulting from requiring app imagery or descriptions to be changed after sign-off will incur a Resubmission Fee of £250 exc vat. Please ensure images and descriptions are correct to avoid this. Changes to branding and content on the downloaded app will not require a resubmission.
If you have any questions about this process, please email support@crowdcomms.co.uk and we'll get back to you!
Creating Your Developer Accounts
If you're looking to get an app submitted to the Apple iOS and Google Play stores, we must publish the app using your organisation's developer account. This article will give you a step by step guide covering how to setup your developer accounts.
For app packages without a Branded Native App, you can still benefit from the native experience by using our Native CrowdComms Container app.
Apple: iOS App Store
- If you do not already have a developer account for CrowdComms to submit under, the next thing to determine whether your organisation has a D-U-N-S number, issued by Dun & Bradstreet. A D-U-N-S number is a requirement of Apple during the enrolment process. If you have a D-U-N-S number, you are ready to continue. If you are unsure, you can use this easy look-up tool logging in with an Apple ID. If your organisation does not have a D-U-N-S, you can register for one here - as a note, this can take between 5-10 business days to receive.
-
Visit https://developer.apple.com/programs/enroll/ and sign in with the Apple ID you wish to use with the Apple Developer Program.
-
If you do not have an Apple ID or would prefer to use a new one, click Create Apple ID to set up a new account. You will be returned to this login screen after creating your new Apple ID.

-
Accept the Apple Developer Agreement

-
You'll then be redirected to the homescreen of the Developer Centre. You'll need to click the "Join the Apple Developer Program" outlined below and then click the blue Enrol button. Alternatively, you can click here to finalise your enrolment.


-
On the next page you'll see an overview of the options to register as an Individual or Organisation.
You will be enrolling as an organisation.
Read through this information and click Start Your Enrolment. - You'll then be asked to select your Entity Type. The options are:
- Individual
- Nonprofit Organisation
- Accredited Education Institution
- Company / Organisation
- Government Organisation
When selecting Entity Type on creation of an Apple dev account, do not select Individual / Sole Proprietor / Single Person Business as this will not allow you to add a secondary developer account or grant access to a third party.
Instead, select Company / Organisation regardless of it being a single person business. The cost is identical to you, however a Individual / Sole Proprietor / Single Personal Business will not be able to grant access to a third party, which is necessary for us to submit apps on your behalf.

- You'll then be asked to agree to some terms and conditions and complete a form with information about your organisation. You'll then be asked to provide contact information, confirm your Apple ID and select whether you'd like to auto-renew your account.
- The next step will be to process your payment for your annual Developer license. This fee varies based on region.
- Once completed, you'll receive a confirmation email from Apple. Please note that the processing of your developer account is at Apple's discretion and can take between 5-7 business days.
- Once the account has been accepted by Apple, invite CrowdComms to the Developer Centre and iTunes Connect and we'll take the process from there. Instructions for doing this can be read here.
Google: Play Store
- Visit https://play.google.com/console/developers and login with your Google account. If you do not have a Google login or want to join the Google Play Developer program with an email address not
provided by Google, click “More Options” > “Create Account” before proceeding. - Continue through the registration process that Google outlines for you:

- Check that you agree to the Developer Agreement
- Then click Continue to Payment
- Google has a $25 Developer account fee. Process this payment by following the on-screen prompts.
- Enter your account information and developer account name.
Developer Accounts Setup? Grant Us Access!
Click here for a guide to give us access to your accounts, now they're setup.
Granting CrowdComms Access to Your Accounts
Apple
For Apple, you'll need to give CrowdComms access to App Store Connect.
App Store Connect
- Sign into appstoreconnect.apple.com and choose Users and Access from the menu.

- Click the plus button and use the below details to add a new user. Use the details for your relevant CrowdComms contact:
CrowdComms UK Details
| First Name | CrowdComms |
| Last Name | Limited |
| buildteam@crowdcomms.co.uk |
CrowdComms Australia Details
| First Name | Peter |
| Last Name | Hair |
| info@crowdcomms.com.au |
Be sure to tick the "Admin" role - and also to check the box saying "Access to Certificates, Identifiers and Profiles".

- Press Invite.
Google Play
- Sign in to https://play.google.com/apps/publish/
- In the Google Play Console go to Settings > Users and Permissions > Invite New User.
- Enter the below information. Use the details for your relevant CrowdComms contact:
The Google Play Console has received a number of updates and changes and now requires a higher level of permissions than in the past. We recommend inviting us as an "Admin" level to keep things simple so we can handle the entire app creation process. If this is a concern for you, please reach out to the team and we'll be able to hop on a meeting with you to talk you through performing the "admin-only" parts of the process and you can give us a lower level of permissions in that specific scenario.
CrowdComms UK Details
| buildteam@crowdcomms.co.uk | |
| Access Expiry Date | Never |
CrowdComms Australia Details
| native@crowdcomms.com.au | |
| Access Expiry Date | Never |
- Click Send Invitation.
One More Step
Now we've got access to your developer accounts, the final step is to complete our app submission details form.
Full App Store Access Problems?
If you aren't willing to give us full app store access, there are some other options:
1. Full App Store Access
The easiest option is for you to give us full access to your developer account as outlined above.
2. Access to Only a Single App
The next option would be for you to begin the app creation process yourself and give us access to just a single app - this would require you to create an app on App Store Connect with specific details provided by us, which your support specialist can help you out with. Then, you can grant us access to just this app. This can be handy if you have several apps on your App Store account and don't want us to have any way of seeing or editing any others.
3. Send Us Your Developer Certificates
If you don't want to give us any App Store access, you can give us a distribution certificate P12, matching provisioning profile and also a push certificate P12 file and we can create the IPA and APK files for your app and return them to you for submission yourself.
4. Only Send us Push Certificate and Resign App Yourself
The final option would be that we create your IPA and APK app files using our own CrowdComms distribution certificates and our own provisioning profile, then you resign the app yourself before submitting to your own app store.
We still require a P12 push certificate to do this - and you will need to ensure the bundle ID of the app matches what our system is outputting.
Please speak to a member of the team for more information about these processes.
Granting CrowdComms Access to Just a Single App
Apple App Store Access
Whoever is your Apple Developer Admin should be able to follow the below 12 steps to give us access to just a single App in the App Store Connect part of your Apple Developer account – and this should (I think!) give us all the access we need to get the app setup for you 😊 Please see the “Apple Instructions.zip” attached to this email which includes 12 screenshots – each one corresponding to the 12x steps below.
1. Login to your Apple Developer Account as the Account Holder at this URL: https://developer.apple.com/account and press Identifiers

2. Press the plus to add a new identifier

3. Choose App ID – the default – and press continue

4. Ensure App is selected and press continue

5. There are a few bits to get exactly correct here!
- Choose a description to the app – doesn't matter what you put here, I usually use the cc_app_id which you can ask your CrowdComms contact for!
- You must type exactly “com.crowdcomms.cc_app_id” as the Bundle ID - with the cc_app_id being different for each of our projects - ask your CrowdComms contact for this.
- Ensure “Associated Domains” and “Push Notifications” are ticked below – the push notifications is right down the page.
- Press continue.

6. Review and press continue

7. Go back to https://developer.apple.com/account and this time press Apps

8. Press the plus to add / create a new app – and choose New App

9. Here you will put in some app information:
- You will put the exact name of the app as it appears on the App Store pages here – 30 characters max and cannot be changed easily, so be sure to get this right
- Set English as the primary language
- Select the Bundle ID “com.crowdcomms.cc_app_id” – the one you created earlier
- Under SKU write something (I would use kerridgesevents but up to you – it’s not visible to any users
- Choose Full Access

10. Go back to https://appstoreconnect.apple.com/access/users - Users and Access and press the Plus to add a new user

11. Fill out Crowd as the first name, Comms as the last name and buildteam@crowdcomms.co.uk as the email and scroll down

12. Be sure to tick ‘access to certificates, identifiers and profiles’, and then you can select which apps you want to grant this user access to – select the app you just created and press invite

That should do the trick for the Apple side of things!
Android Google Play Console Access
1. Login as an admin to the Google Play Console: https://play.google.com/console/developers
This Google guide should help setup the equivalent for Google Play: https://support.google.com/googleplay/android-developer/answer/9844686?hl=en-GB
If you need to make the app on Google Play first, which I think you do – the two screenshots below should show the process. You will again have to put in the app name as you want it to appear on the app store page when creating it, but there’s less to do in terms of setup on Google than Apple, so hopefully the two screenshots combined with the help guide above helps!


App Submission Details
Ready to Submit?
Fill out our native submission form by clicking here. This tells us we can go ahead and submit your app!
If you have any questions about the form, read on.
What We Need
There are two main types of content we need from you in order to submit your app - Text Content and Design Assets. You must provide us with the text content, however we can create the native design assets for your native app if you choose to use our in-house design service.
It is important to get these approved from you, because the below content cannot be changed after submission - only content within the app itself can be changed after submission.
Text Content
App Store Listing Title
This will be the title in the app stores.
Please note this is limited to a maximum of 30 characters (Spaces included)
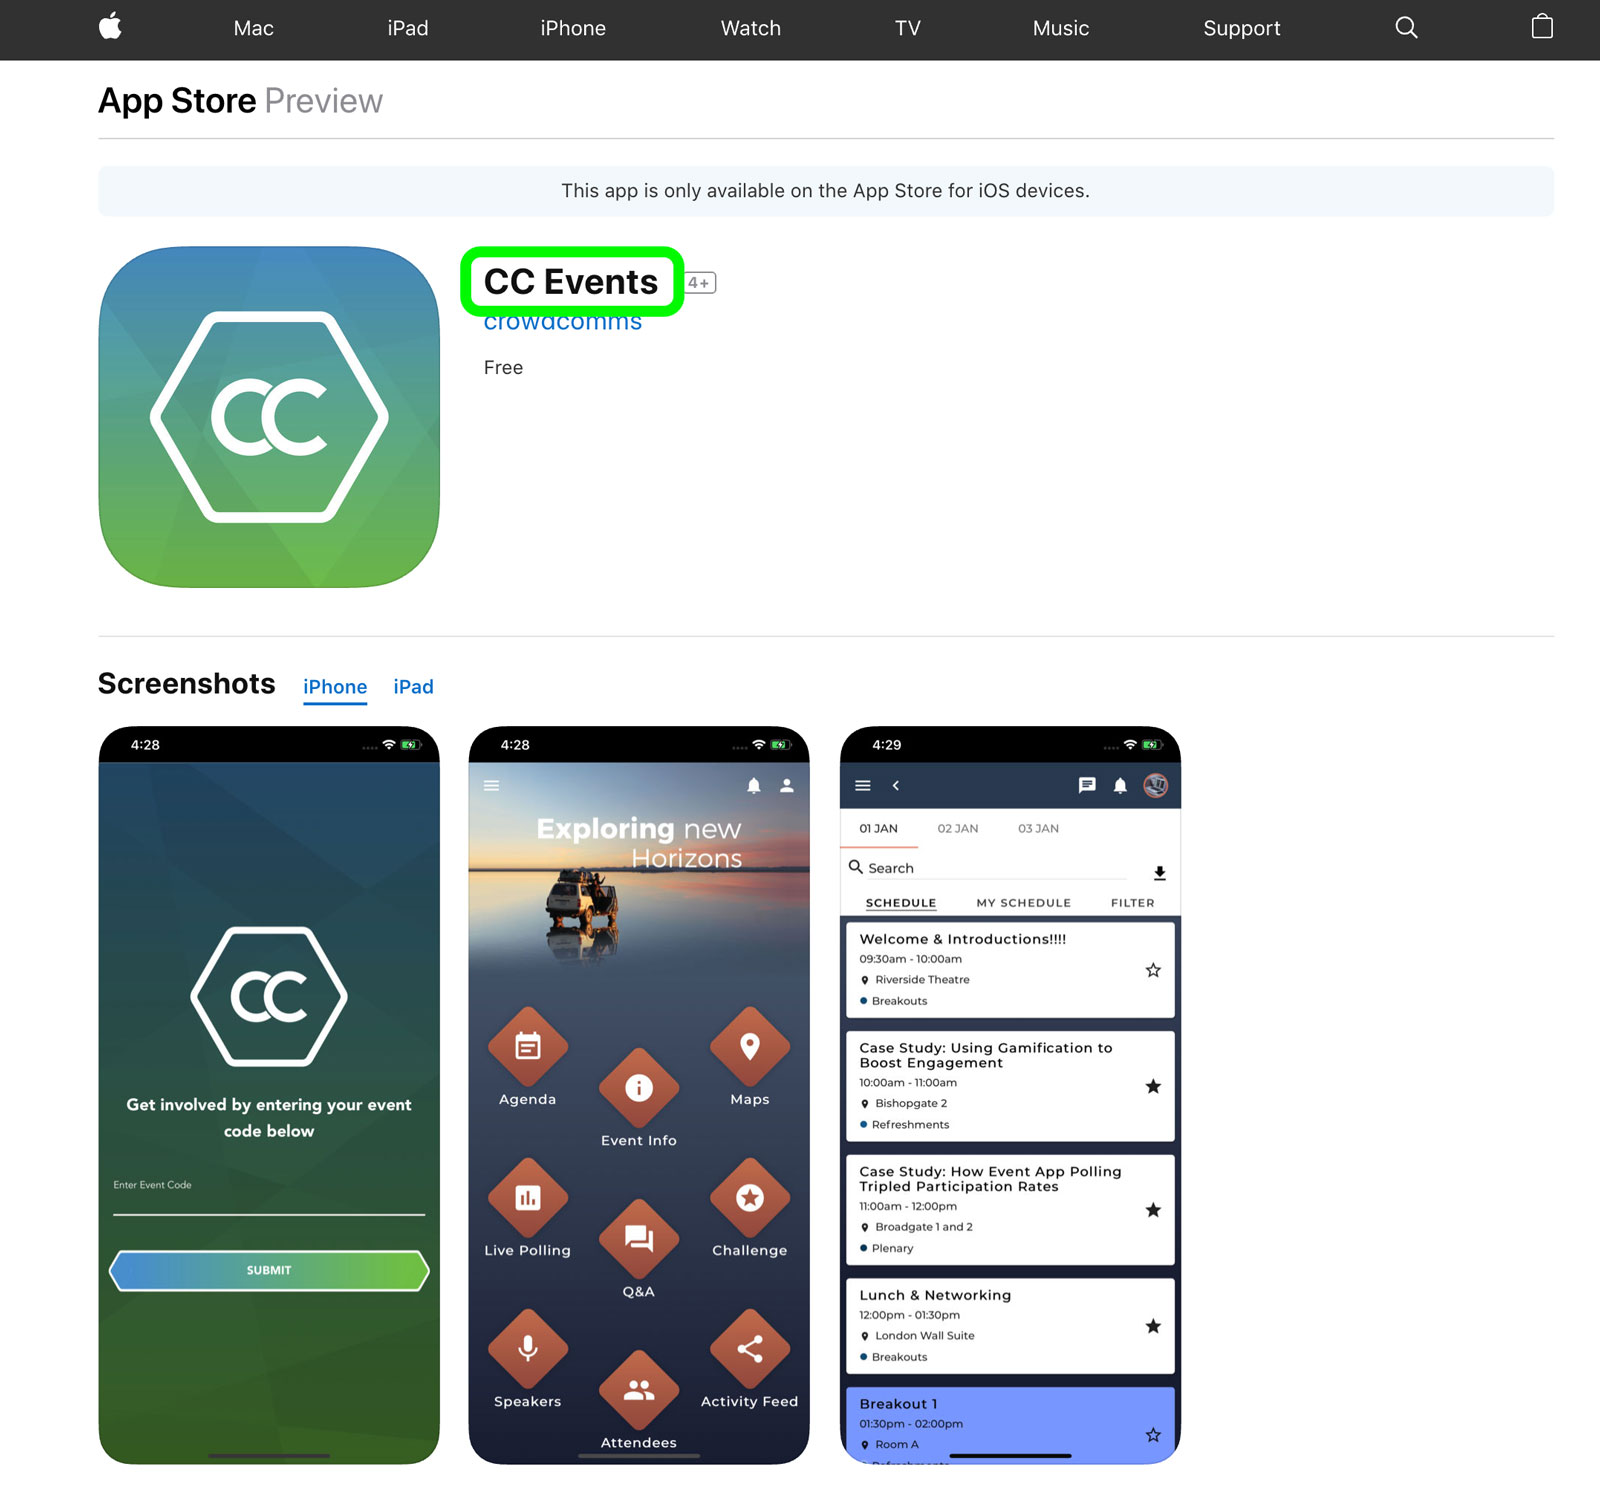
App Short Title
The app short name is the name which appears underneath the icon on smartphone home screens.
Please note that app short names longer than approx. 10 characters will have “Ellipses” inserted into their names under the App Icon. If this is a problem, please use an app name shorter than or equal to 12 characters. Screenshot below to explain.
App short names cannot contain special characters.

Short Description
Just needs to be a brief description about the app/event
Please note this is limited to a maximum of 80 characters (Spaces included)
Long Description
This is the description that appears in both of the app stores, and should be a full description about the app/event
Please note this is limited to a maximum of 2000 characters (Spaces included)
Keywords
One or more keywords that describe your app when people search for the app in stores. Keywords make App Store search results more accurate.
Please note you are limited to 100 characters. There is no max character limit per keyword as long as you don't go over the overall limit.
Example Information
App Name
Plantconf
Short Description
This year's Plantconf app contains all the information you need to enjoy a great weekend at Kew Gardens.
Long Description
This year's Plantconf app contains all the information you need to enjoy a great weekend at Kew Gardens. Some of the key features of this year's app are:
- Full interactive agenda
- Live Polling
- App Game with a prize
- Activity Feed to post pictures
Keywords
Plants,botanicals,conference,game,app
Design Assets

Splash screen image
The splash screen image appears whilst the app is loading/opening.
Please note the Image must be 2732px (Width) x 2732px (Height) PNG (no alpha or transparency). See the example splash screen image above - be sure to keep important text or images in the very centre to avoid any cropping.
App Icon
Please note the Image must be 1024px (Width) x 1024px (Height) PNG (no alpha or transparency)
Feature Image
Please note the Image must be 1024px (Width) x 500px (Height) JPG or PNG (no alpha)
The feature image can be displayed on the Google Play store. More information available here.
*IMPORTANT - Resubmissions resulting from requiring the imagery or descriptions to be changed will incur a Resubmission Fee of £500 exc vat. Please ensure images and descriptions are correct to avoid this. Changes to branding and content on the app will not require a resubmission.
Native Imagery Template

