2. Integrations
- Introduction to the integration options: Video Tutorial
- Cvent Integration Setup Guide
- Eventboost Integration
- Eventsforce Integration Setup Guide
- Google Analytics Integration
- IDLoom Integration Setup Guide
- Stova (Aventri) Integration Setup Guide
- Zoom Integration Setup Guide
- Zoom Integration Vs Desktop Features
Introduction to the integration options: Video Tutorial
Registration Platforms with existing API Integration
Each come with a step by step guide in this chapter. If you need further support please contact live chat or your dedicated Project Manager.
- Aventri
- Cvent
- Eventboost
- Eventbrite
- Eventsforce
- idloom
- Typeform
Export & Import
Simply export your registrant list from your registration platform and import list into the CrowdComms Platform
- Instantly available and included within standard platform package
- Go to your registration platform and export your registrant list
- Go to the CrowdComms dashboard (CMS) and go to the people section
- Export the people template from the CrowdComms dashboard
- Match up your export from the registrant platform with the provided template leaving the A column blank
- Import the updated template into the CMS and this will pull through your registrant list into the CrowdComms platform
- The people imported will now have access to the CMS and appear within the attendee list providing you've created an attendee module to be visible on the front end
- You can repeat this process as many times as required by exporting the latest excel from the CrowdComms dashboard, adding your recent registrants and reimporting

Create an API integration with the CrowdComms Event Platform
- Setup API Integration using our public api - https://papi.crowdcomms.com/
- This will require development work from the registration platform. All the details are outlined on the Public API including end points and how to create the required integrations

Use Zapier to build integrations with supported apps
- Zapier is a platform that facilitates integrations between supported apps - View supported apps here
- Important: In order to use the Zapier integration, your third party solution or internal solution must be supported on Zapier.
- There are costs from Zapier relevant to the data transferred - Zapier Pricing
- The CrowdComms platform can be integrated to third party apps using Zapier. CrowdComms maintain a platform that is compatible with Zapier, however the setup and implementation of a Zapier integration is not a service CrowdComms offer and therefore is managed by the CrowdComms customer.
- Login to your Zapier account
- Use this link to access CrowdComms on Zapier
- From here, you will be able to integrate CrowdComms with the other supported app including the automatic transfer of people profiles, custom fields and groups.
Note: CrowdComms provide an in platform registration offering, along with integrations with a number of leading registration providers. Zapier is an option for customers to self manage integrations with their preferred platforms where an integration does not currently exist and import / export is not suitable.

Custom Integration
- Public API for the third party software
- Details of exactly what is required from the API integration i.e. what data will need to be transferred
- Details of any existing integrations and how these have been set up in the past
Please note custom integrations are not always possible and the above information will be required to explore feasibility, costs and timelines. Custom integrations will be considered and if appropriate scheduled taking into consideration existing development commitments. Any custom integration can take significant time and requires extensive testing in order to implement.
Cvent Integration Setup Guide
Cvent Integration Training Guide
- Prerequisites
- Integrating Cvent into CMS
- Webhooks
- Post configuration
- Custom Fields
- Useful Links
Prerequisites to Integrate with CMS
- Access to Cvent Developer Portal at https://developer-portal.cvent.com/
- Access to Cvent Events Portal (REST API & PUSH API within the Integrations section) at https://app.cvent.com or https://app-eur.cvent.com/ (depending on the location where the account is stored)
- Access to CMS>Integrations>Cvent
When the Cvent integration is correctly setup, only attendees who have been created from the point of the integration being setup will be synced with your CrowdComms platform.
How to Integrate Cvent with CMS
Before you initiate the integration you will need to set up an Application in the Cvent Developer Portal. Within the Application, you may select all of the EVENT scopes (please click on the link for more information https://developers.cvent.com/docs/rest-api/overview). However, access to ALL scopes is not essential, the minimum required are as follows:
event/events:read
event/custom-fields:read
event/registration-types:read
event/contacts:write
event/sessions:read
event/attendees:read
- Log into CMS
- Select App
- Click on Integrations
- Click on the Cvent tile

Next you will need to populate the cms fields with the relevant information
- Client I.D – can be obtained from Cvent Developer Portal after an Application has been created
- Client Secret – can be obtained from Cvent Developer Portal after an Application has been created
- Host – the Endpoint host varies based on which server region your Cvent account is hosted in. This can be also identified based on your event’s URL, starting with either https://api-platform.cvent.com or https://api-platform-eur.cvent.com
- Event I.D – can be obtained from the Cvent Events Portal
- Session Import Method – a dropdown menu, which enables you to select how you would like to import your Cvent sessions to your CrowdComms Event App. The options are:
a. Managed Schedule – Your Cvent session will be imported to your delegate’s tailored agenda. Please refer here to read more about Managed Schedule.
b. Personal Agenda – Your Cvent session will be imported to your delegate’s favourited agenda. Please refer here to read more about Personal Agenda. - Default People Group – the default people group to which all Cvent attendees will be added
- Two-Way Integration toggle – switch on this toggle of you want to sync cms data into Cvent, otherwise by default attendee data will only pull from Cvent into the CMS
On a two way integration, we can only sync changes to attendee details to Cvent, but we cannot sync changes to session details back to Cvent

- Once the above form is filled in, then click Save
A module named Cvent agenda will be created in the CMS after the integration is set up. Do not delete this module if you want to sync your Cvent sessions into the cms (refer to Setting up the webhook configuration section below)
Setting up Webhooks
To allow continuous synchronization from Cvent to CrowdComms you will need to set up Webhooks in the Cvent Event Portal.
Syncs from Cvent to CMS can take up to 20 minutes. Syncs from CMS to Cvent is more or less instant
After you have saved the integration details in the CMS you will then be shown the Webhooks section which contains the Webhook URL and Webhook Token

1. Adding a webhook configuration
- In Cvent Event Portal go to Admin > Integrations > Integrations > Push API Integrations
- Click on Create Integration
- Add Name
- Choose Type Webhooks
- Add the Default Endpoint which is the Webhook URL from the CMS

- Choose Connection Type Token Based
- Add the Authentication Token which is the Webhook Token from the CMS
- Click Save

2. Setting up the webhook configuration
- Click on the name of your Webhook configuration you just created
- Click Edit on Webhooks
- Select Yes for Active
- Select No for Default
- Synced Objects
- Attendees - always select Yes
- Sessions - select Yes if you want to sync session details, if not select No

- Click Save
3. Adding Integration Points for data to be transferred
- In your webhook configuration under the Integration Points tab click on Add Integration Point
- Integration points to add:
- Sessions – **Only to be added if you want to sync Cvent sessions into the CMS
- Session Created
- Session Modified
- Session Delete
- Invitees
- Invitee or Guest Accepted
- Invitee or Guest Modified
- Invitee or Guest Cancelled
- Invitee or Guest Registers for Session – **Only to be added if you want to sync Cvent sessions into the CMS
- Invitee or Guest Cancels Registration for Session – **Only to be added if you want to sync Cvent sessions into the CMS
- Invitee or Guest Accepted
- Contacts
- Contact Edited
- Sessions – **Only to be added if you want to sync Cvent sessions into the CMS
The API will only process the following webhook event types:
InviteeOrGuestModified
InviteeOrGuestCancelled
InviteeOrGuestAccepted
InviteeRegistersForCventSession
InviteeCancelsRegistrationForCventSession
ContactEdited
SessionCreated
SessionUpdated
SessionDeleted
- Click Save
4. Activating Webhooks for your event
For each event you want to integrate with a CrowdComms app you need to set up a new Webhook configuration
Post Configuration
- Only attendees with the status Accepted will be added to the CrowdComms app
- Existing attendees will be removed from the app if:
- their status changes to other than Accepted
- they are cancelled on Cvent and an InviteeOrGuestCancelled webhook is received
- their status changes to other than Accepted
- In a two-way integration data will be synced back to Cvent only for attendees who have been added to the CrowdComms app via the integration
- In a two-way integration removing attendees from the CrowdComms app will not affect the Cvent platform. You need to manually remove attendees from Cvent
-
In Cvent as an admin there are two ways to make changes to attendees:
- Modify Registration -> any updates made this way will sync into the cms for the basic fields (first name, last name, email) and any other fields set up in the Custom fields tab in the cms in the Cvent integration's settings.
- Edit contact information -> for the changes to successfully sync, make sure to add
Contact EditedIntegration point to the webhook setting in the Cvent Admin, as mentioned above in the previous section. If you are editing an attendee's contact information, due to the limited data sent by Cvent in theContactEditedwebhook, we are unable to update profile image (if mapped in the cms Custom fields tab) and any Cvent registration type mapped to a cms people group. However, these can still be updated through Modifying the registration or if attendee is modifying their own registration.
Custom Fields
Upon successful integration only delegate's First Name, Surname and their Email is automatically synced, all other information needs to be set up using the Custom fields tab.
Click on the “Custom Fields” TAB in CMS


- The Cvent Field dropdown will display additional data that has not already been mapped automatically, which you can manually map to the Dashboard. Some examples include:- Address, telephone, and Contact custom fields, or registration types which you may have added in Cvent
- You can add as many custom fields as you wish
- Registration Type can only be linked to a People Group
- Cvent Contact Custom field can only be linked to a CC Custom field or a Person Field
In case of a two-way integration we are unable to sync changes into Cvent on the following fields:
profileImageUrl
homeCountry
workCountry
Useful links
- How to set up an Application on Cvent developer Portal
https://developers.cvent.com/documentation/rest-api/developer-quickstart/ - How to set up Webhooks
https://developers.cvent.com/documentation/webhooks-integration-user-guide/
Eventboost Integration
Eventboost is an all-in-one event management software and online registration platform which is now able to be integrated with the CrowdComms platform.
In order to complete the integration there first must be an event created by Eventboost which will have a unique Client ID and Secret. Only Eventboost are capable of generating this information so usually it should only ever be Eventboost that will complete the integration with CrowdComms software. However on the occasions when someone other than Eventboost are generating a integration the user will need to contact Eventboost/CrowdComms client to retrieve the Client ID and Secret before attempting integration.
The user will also need to be able to login the Eventboost site as a registered user/On a 30 day free trial to retrieve the additional required data.
Eventboost Integration

2/ On the Eventboost site click on "New Event" to create a an event button or the "My Events" to display existing events the user has already created.
3/ Select the "Event Schedule" and select a date for the event from the calendar

4/ Change "Event Type" to "Public event"
5/ Change "Event Format" to "Virtual event"

6/ Click "Yes" button on warning modal
7/ Change "Event Language" to the appropriate language
8/ Untick "Event options" for "Registration" unless you wish the users to complete a registration process on Eventboost and carry that data over within the integration of the user profiles.
9/ On the created event, update with a "start time", "end time", and "description".

10/ Click on the "Save" button.
11/ Click "ok" on the warning modal.
12/ Click on the "gear" button next to the session
13/ Select the "no" node and "ok" button.
14/ Click on the "Save" button.
15/ In CMS using the Eventboost details for the "Secret" and "Client ID" update the corresponding Eventboost integration fields
16/ Using the "Event ID" from the event made on the Eventboost website, update the "Event ID" field in CMS
17/ Update the "Session import method" to "Managed schedules" and click on the "save" button

Eventboost Custom Fields
You can also map additional delegate's profile information from Eventboost using the Custom fields Tab.
1/ Click on "Custom Fields" tab

2/ Click on "Create New" button

3/ Input a reference into the "EB Field"
4/ From the "type" select "Custom Field"
5/ From the "Customer field" drop down select a custom field that exists within CMS for the app
6/ Click on the "Save" button

Eventsforce Integration Setup Guide
Before you can connect your event to CrowdComms, you will need to generate an API user within your Eventsforce account, and generate an API key. Instructions on how to do this can be found here:
If you find you have any trouble with the setup, then you will need to get assistance from Eventsforce direct before we can start the setup with our platform. To do this, you can start a chat with an Eventsforce support agent from within your admin area.
From our side, please note that our system only allows group names up to 50 characters long. So you will need to bear this in mind with your fields that you wish to pull through into cc groups
Please note: You need to make sure that within Eventsforce all your custom fields are set up to apply to 'this event only'. If you set them up as 'available to all events' then they will count as event-spanning, aka profile level questions. They are then carried within your Eventsforce profile as Custom Data. This will NOT pull through via the API, which only pulls through your event specific registration data, so please make sure your questions and answers are correctly configured before setting up your API.
We don't filter the registration or payment status when requesting the attendees from Eventsforce. However, the Eventsforce API states that if no registration status is specified, by default it will only return complete registrations. Therefore, we will only get complete registrations pull through to the CrowdComms cms. If you need further information on this, please refer to their documentation here.
Connecting EF to CrowdComms
- Log into the CrowdComms dashboard with your Credentials
- Click to edit the app that requires integration
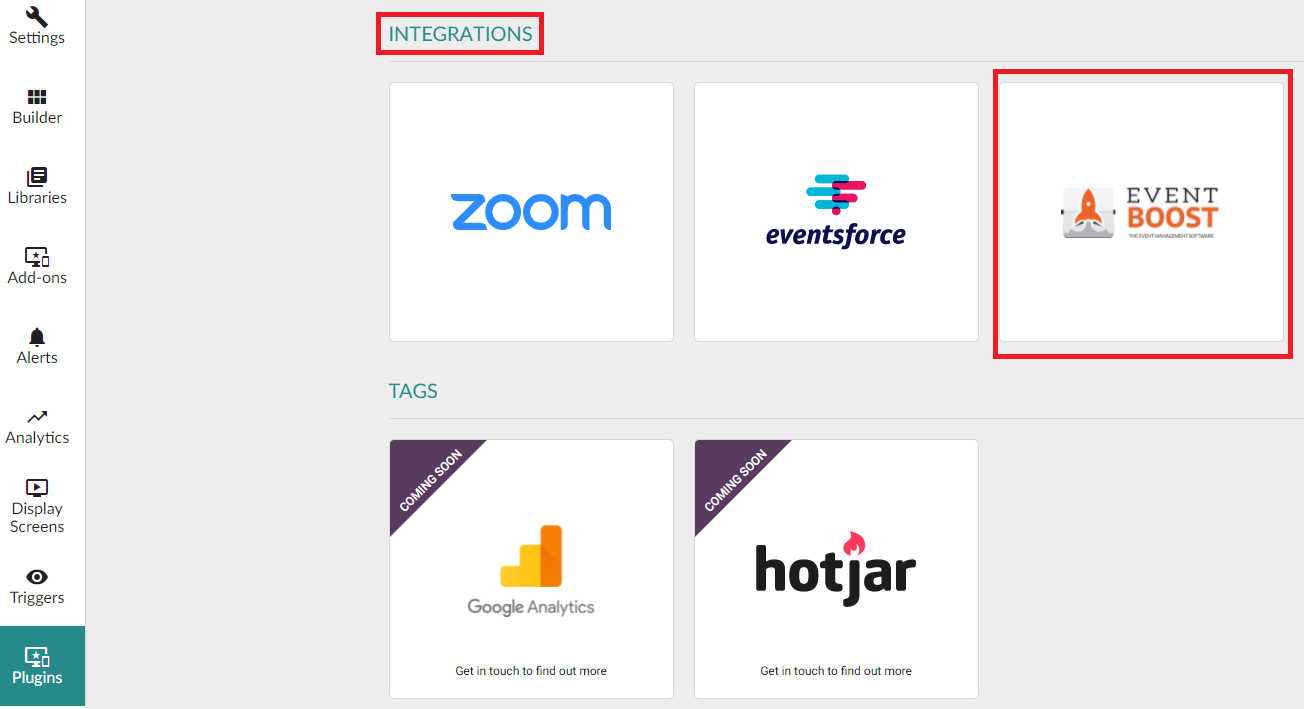
- Click on “Plugins” at the very bottom of the left hand menu

- Click on the “eventsforce” Tile

- Enter the following.
- Client I.D
- Event I.D
- API Key

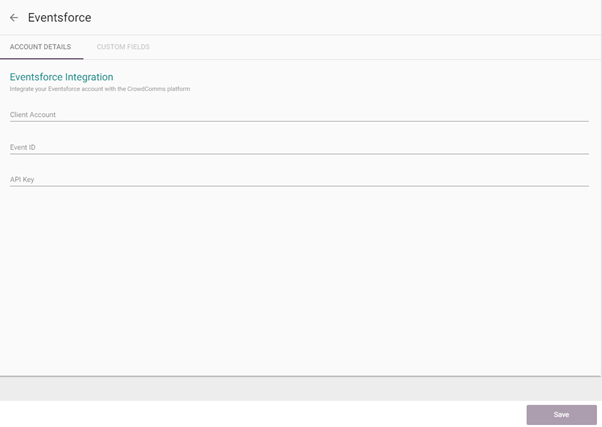
- Click “Save”
Automatic Field Mapping
The above steps may be all you need to do depending on the fields set up on your reg form. The following information will pull across as standard:
Attendee Information:
- First Name
- Last Name
- Title
- Job Title
- Company
Sessions set up in eventsforce will pull into a new agenda module in CrowdComms, so you won’t need to create one. The session details which pull across are:
- Title
- Start Date/Time
- End Date/Time
- Description
- Session presenters
Please note: session presenters are added to a ‘Presenter’ session group
Abstracts are also added to the sessions as documents
Custom Field Mapping
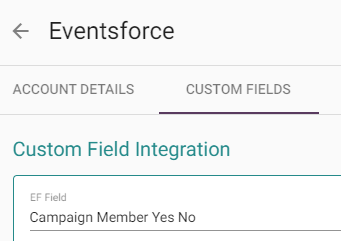
Now that the EF connection details have been inputted & saved, you can now click on the “Custom Fields” TAB to input any custom fields required.
- Click on the “Custom Field” TAB

- Click on “Create New”

- Enter the Name of the EF Field required to be pulled through

- Select the type (Custom Field or People Group)

- Select the exact group/field to be mapped. Which drop down is available as to select here will depend on which ‘type’ you selected in step 4.

- Click “Create” (You will now receive a message to say if the field mapping has been saved or not)

- Repeat the process as necessary


Notes
- Syncing between EF and CrowdComms takes place once per hour, on the half hour (30 mins past the hour)
- You can view when the last Sync was by going into the EF tile in Plugins

Google Analytics Integration
Google Analytics (GA) is a free web analytics service that tracks and reports website traffic, it works by the inclusion of a block of JavaScript code on pages on our platform. The tracking operation retrieves data about the page request through various means and sends this information to the Analytics server.
Integrated properties can then be viewed for the analytical data captured to be used for report creation. 
To integrate an CrowdComms application with Google Analytics the user must first have a Google Analytics account which can only be created by a user with a gmail email address and Google Profile. The user then needs to generate a GA property which is achieved by going to Admin>Accounts>Create Account. At this point the user then needs to generate either a Universal Analytics (UA) property or a Google Analytics 4 (GA4) property.
- Google Analytics 4 uses the User ID method and considers active users on the site, who are currently engaging on the site, to calculate user count. (new applications)
- Universal Analytics uses the Client ID method and focuses on total users on the site to calculate user counts. (existing applications)
How each is set up can be found here . As a general rule the Universal Analytics property should only be used for existing applications and due to attrition eventually not be used at all. A Google Analytics 4 property should be used for new applications recently created.
CMS - GA Integration
Depending on which property is being used will depend on which Tag integration is selected.
Integration of Google Analytics 4
- On the GA integration screen there will be the empty field "Measurement ID". This value can be found from your GA property. Navigate to Admin>Data Stream>Stream to find the "Measurement ID".
- Input the "Measurement ID" value in the empty CMS field "Measurement ID".
- Select the "Save" button.

This will complete the integration for the GA4 property.
Integration of Universal Analytics
- From the GA integration screen in CMS select the "Universal Analytics" tab. This will direct the user to the UA integration screen with a field called "Tracking ID". This value can be found from your UA property. Navigate to it by Admin>Property Settings. The "Tracking ID" is displayed here but it is also the the property number itself.
- Input the "Tracking ID" value in the empty CMS field "Tracking ID".
- Select the "Save" button.
![]() This will complete the integration for the UA property.
This will complete the integration for the UA property.
Requirements For User Data Capture
To permit GA to capture data from a user logged into the Front End of the application the user needs to Accept the cookie consent notification for "Analytic Cookies".
 The settings on a users browser and device must also permit the transmission of this data and is done differently depending on the device and browser being used. Please see below the different settings for each scenario:
Chrome Web -Standard Protection enabled

Chrome Android-"Safe Browsing" and "Do Not Track" disabled.

Safari Web- "Prevent Cross Site-Tracking" disabled.

iOS Safari- "Prevent Cross Site-Tracking" and "Block All Cookies" disabled.

Edge Web-Tracking Prevention disabled.

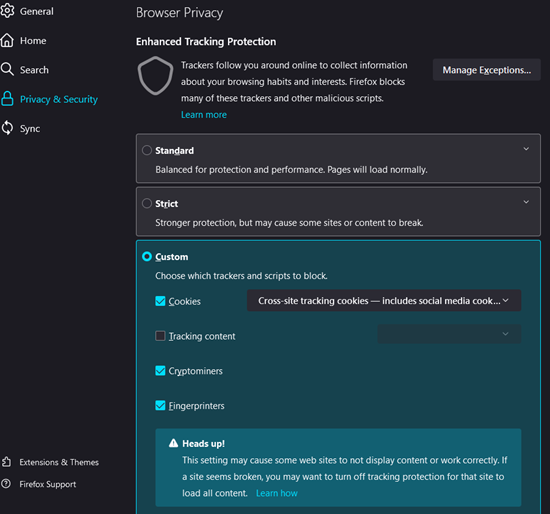
Firefox Web-Set to Custom and disable "Tracking Content".
IDLoom Integration Setup Guide
Please note: This is a self-service guide for when setting up your own idloom account with our platform. These instructions will not apply if we have set up registration for you in our CrowdComms account. In that case please speak to your support agent who can set it up for you.
There are two main elements to setting up your integration with idloom. Part one is within the IDLoom CMS itself, where you will create the integration. This will generate your API key. The second part, is within the CrowdComms CMS, where you will link the integration and relevant event to the platform.
IDLoom Setup
You will want to do this one you have your event all set and ready to go.
- Click to 'add integration' and select 'custom integration' from the box that pops up
- Fill in the name
N.B. this will usually be the name of the event but it doesn’t matter what you call it - In the box for ‘Available for profiles’ select the profile that your event is set to
- Check the boxes for ‘Allow API access’ and ‘Activate webhooks’
- Click save – this will then generate your API key

N.B. Once you click save, you will see both your API key and your account name. It would be good to make a note of this at this point, or do the next steps in a new tab so you can easily access all the bits you need.
- Go to geeks – integrations
- Click the toggle to set your integration to 'active'

- Press save

- Go to ‘Analytics & tracking’ to get the ‘Event UID’

N.B. Make a note of this, as well as your event name as written in the idloom CMS, or again leave this tab open.

CrowdComms CMS
Now go to the corresponding platform in the CC dashboard and follow these steps:
- Go to plugins – idloom
N.B The ‘idloom account’ and ‘idloom server’ information will be pre-filled with our CrowdComms account data. You will need to override this with your own. Please fill in your account name and server info (the server will always be idloom.events) - Enter your API key

- Press save

Automatic Field Mapping
The following fields will map across by default:
Title –> Title
First Name –> First Name
Last Name –> Last name
Email –> Email
Job Title –> Job title
Company name –> Company
Phone/Mobile number –> Phone number
N.B. Your information will only map across automatically if using the default idloom fields for this information.
If you create a new custom field and just call it 'first name' or 'company' for example, the system will not automatically know where you want to map this to. All custom fields will need to be mapped manually. If you are unsure if you have used a default field or created a new one, the easiest way to check is by toggling on 'display field names'
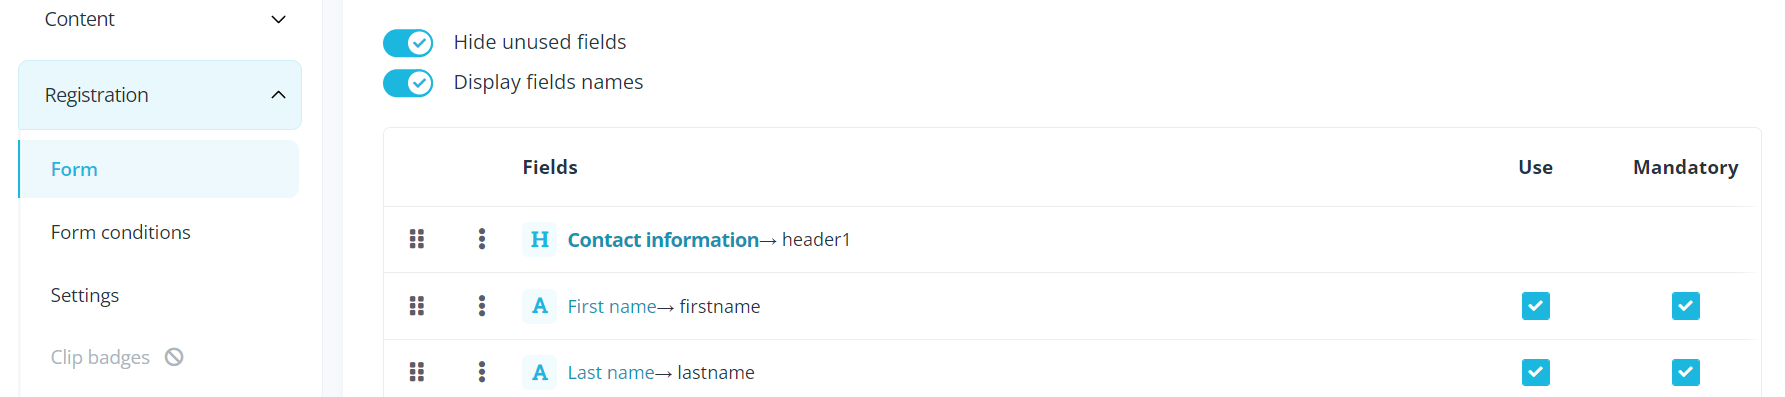
All default fields will display the name, whereas fields you have created will all say 'free_fieldX' with x being a number that will change depending on where in your list of additional fields created it is.
N.B All other default CrowdComms fields can be mapped into, e.g ‘About’, ‘Address’ and all social media fields if required (perhaps as a way of getting speakers to self-populate their profiles), it just means you have to manually map them using the CMS. Any other form fields/questions will also need to be set up as custom fields in the CrowdComms CMS before you can map them
Key Considerations
The mapping between the default fields is hardcoded and therefore no other idloom fields can be mapped into them. You will need to consider this if you want these fields displayed under a different name in CrowdComms. An example would be if you want the company name to display under ‘organisation’ rather than ‘company’. You have 2 options here, either create a custom field in idloom with a corresponding custom field in CrowdComms, and link them. Or you would use the default field in idloom (as you can re-name them) but bearing in mind this would pull into the company field in CrowdComms. To change this, this would be part of a custom design request that you would need to check with your support manager. We could then get this changed on our end via custom design. We would only advise using this second option, if it is key to have this field visible under a person’s profile from within the main people list, rather than having to click in to see all custom fields. So please weigh up the best setup for your specific event.
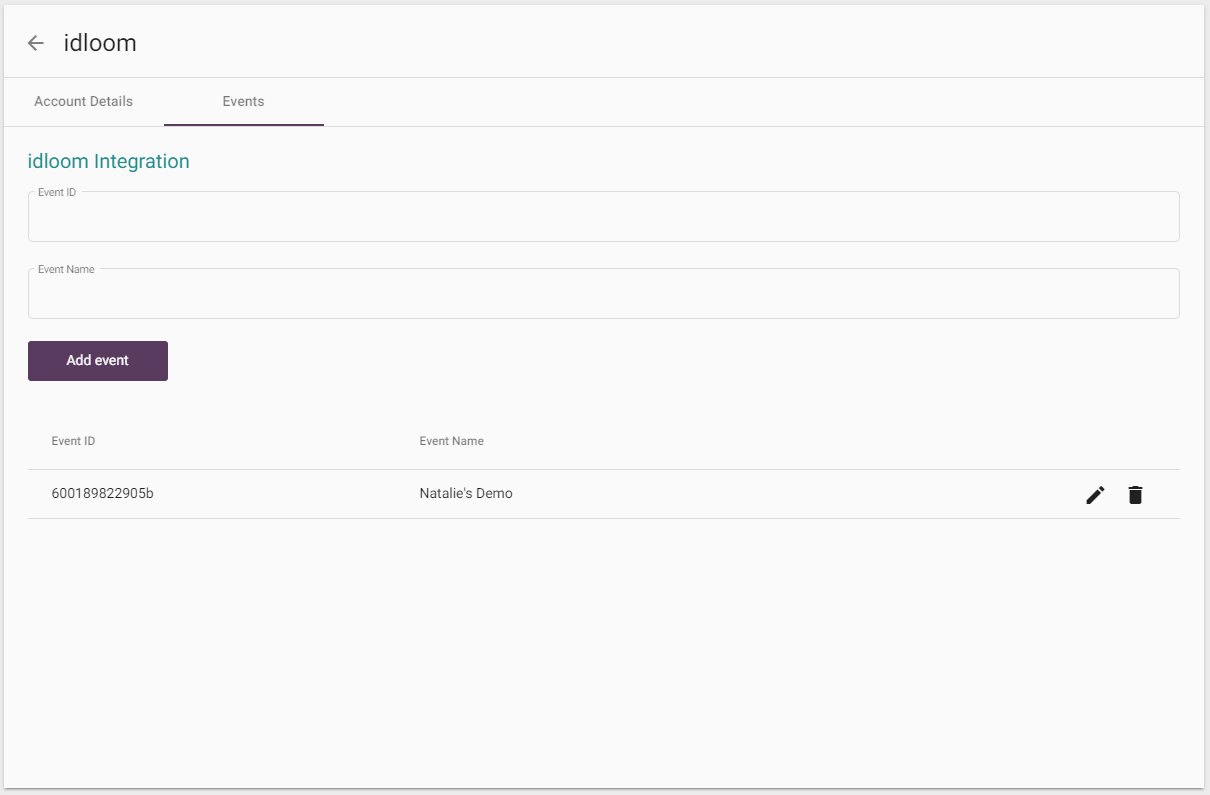
- Click on the ‘Events’ tab at the top which should now have become selectable from completing step 3.

- Fill out your event ID (UID) and event name as found on the ‘analytics & tracking’ section within your event – geeks.
- Click save
N.B. This will then add the integration to the platform.
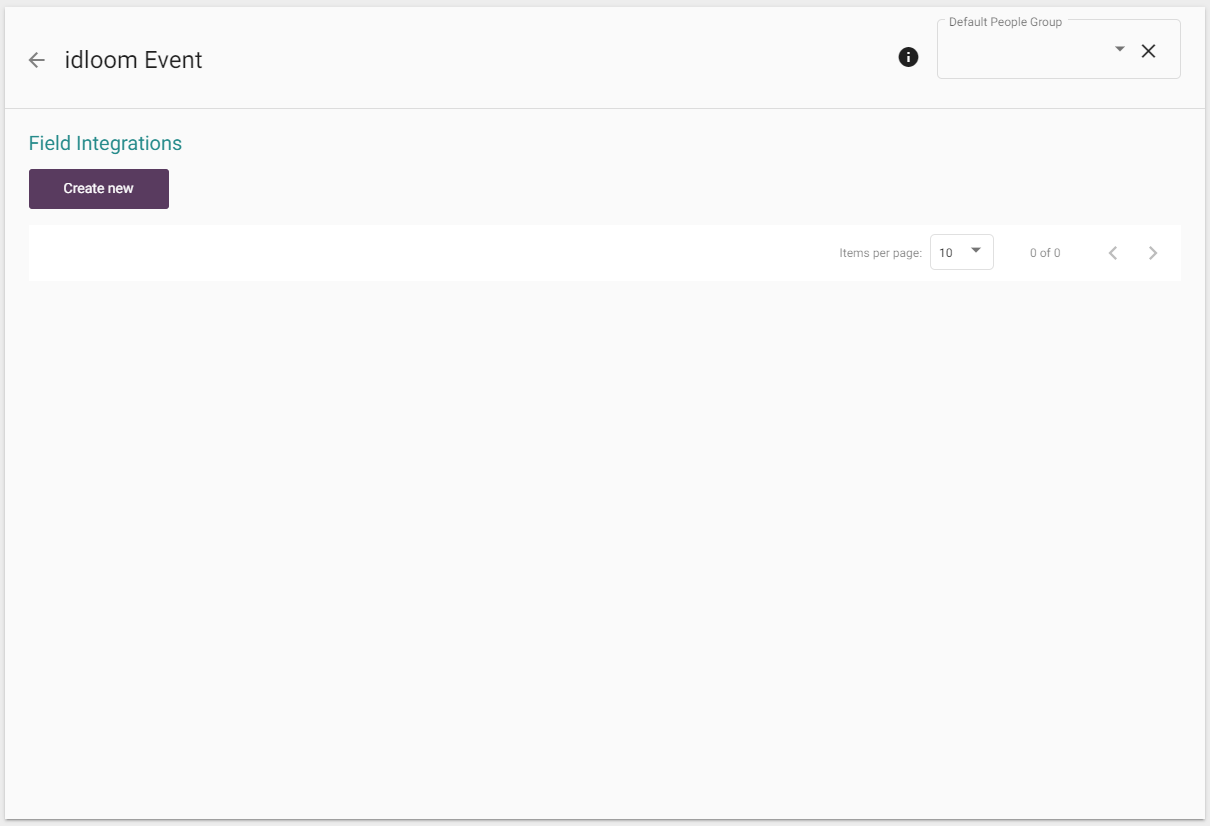
- Click the pencil icon to map custom fields
- Select the ‘Default People Group’ top right that you would like registrants to pull into if required. (If blank they will default to the ‘everyone’ group).

N.B. If no custom fields are required, then setup is now complete. Otherwise, please continue as below. - Under ‘Field Integrations’ click ‘create new’ to begin mapping custom fields
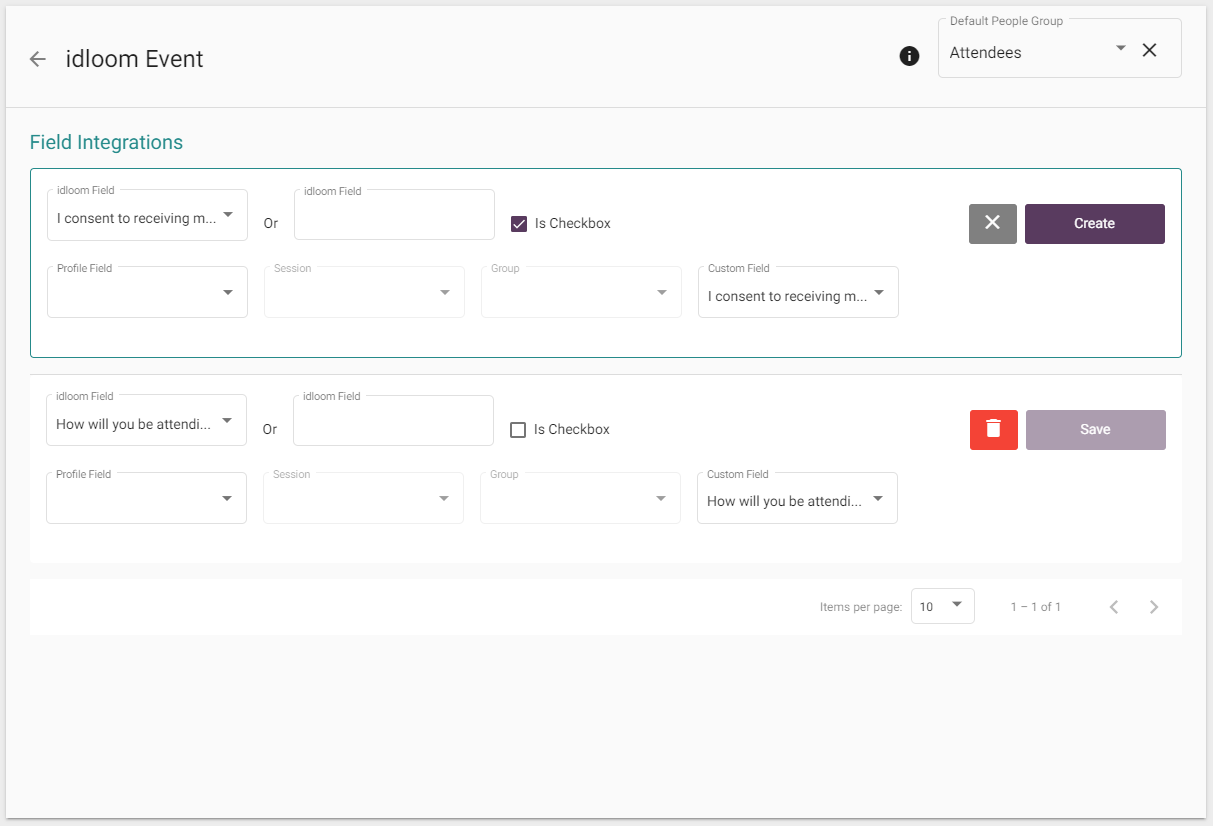
N.B At the top of this section it says ‘idloom field’ or ‘idloom field’. For the moment please ignore the second box of the same name, as this needs to be updated by the devs. The first box will have a drop down of all fields, categories and options on your registration form.
- Select your field/category/option from the list
N.B. With the country field, because of a change on idloom’s end this will now only pull through the country code by default. If you need the whole name to pull across you will have to speak to your support manager as this will require a bespoke setup we will need to do for you. - On the line below, choose where you want to map it to by finding the corresponding box for the field/category/option you chose. i.e if you chose to map a field, then you can now only select options from the profile field or custom field boxes.
N.B. idloom fields can only map to cc fields (profile and custom depending on what’s relevant) and categories and options can only map to sessions or groups.
- If your field is a tickbox, then also remember to tick this box. This is required as idloom will send the information through as binary i.e. a 1 or a 0 and ticking this box will turn it into a yes/no.


Useful Information
- Registrations will start pulling across once the integration is set up. Previous registrations won’t be automatically added, they will need to be uploaded manually or the webhook has to be resent manually.
- Registrations with the following statuses won’t be added to the app or will get removed:
- Registration status: Canceled, Rejected, Not coming, To contact
- Payment status: Waiting for payment, Canceled
- If somebody registers via idloom and then is deleted in idloom, their profile will be removed from the cc platform also. However if somebody was manually added to the cms, then even if they register via idloom at a later date, when they are removed from idloom they will remain in the cc platform. If this happens, then an email will be sent to the listed account owner in the idloom cms to notify you that somebody was removed from idloom but they still exist in crowdcomms
Troubleshooting
Errors in the cms
- Is the API key correct?
- Is Allow API access and Activate webhooks switched on in the Idloom Integration?
- Is the event_uid correct?
Data not pulling
- Check that you turned your integration on at profile level.
- Check the Logs in Idloom in the Attendee details.
- Check the Integration details in Idloom. Under Api & Webhooks you should see 3 webhook events added with urls including the app shortcode:
- create
- update
- delete
- Have you changed the shortcode since setting up the integration? Since the webhooks contain the shortcode, if you have changed this then your attendee data will show an error and the webhooks won’t send to the cc platform. If you are confident in fixing yourself then you can either edit them to contain the correct shotcode, or delete and start again. It is probably safest & easiest to delete them and then do another test registration yourself which will generate new webhooks. You can then re-send the webhooks manually for anybody who registered whilst you had this error
Stova (Aventri) Integration Setup Guide
Stoav (Aventri) is an event management software and online registration platform. If you use Aventri to market your event and collect registration information from your delegates, you can now integrate your Aventri account to your CrowdComms platform.
Page content:
- Access Requirements
- Integrating Aventri into CrowdComms Content Management System (CMS) Dashboard
- Automatic Mapping from Aventri to CrowdComms
- Mapping of Custom Fields from Aventri to CrowdComms
- Setting up Webhooks to enable continuous synchronisation between Aventri and CrowdComms
1. Access Requirements
1.1. To start the integration with Aventri, you will need access to:
a. Aventri account
b. CrowdComms Content Management System (CMS) Dashboard
2. Integrating Aventri into CrowdComms CMS Dashboard
2.1 First, you will need to log in to CrowdComms CMS Dashboard
2.2 Then select the Event App you wish to integrate with your Aventri registration platform
2.3 On the left-hand side menu, click on ‘Plug Ins’ and click on the ‘Aventri’ tile
2.4 Before you initiate the integration, please ensure that the status of your event in Aventri is ‘Live’
2.5 You will then see the ‘Account Details’ tab with several fields for you to populate. These fields need to be populated with your Aventri account information
Retrieving Integration Information from Aventri
• Log in to your Aventri Account
• On the left-hand side of the screen, navigate on the hamburger menu, go to ‘Settings’ and click on ‘Account Settings’
• You will then see several tabs, and several other sub-tabs, click on the ‘Integration’ tab and click on ‘API’
• Record or copy the Account Key and paste it into the API key field in the CrowdComms CMS Dashboard
• Record or copy the Account ID and paste it into the Account ID field in the CrowdComms CMS Dashboard
• To locate your Event ID and the Endpoint Host, go to your event’s list and click on one of your events.
• The Event ID can be found next to the event’s name. Record or copy the Event ID and paste it into the External Event ID field in the CrowdComms CMS Dashboard
• The Endpoint host varies based on which server region your Aventri account is hosted in. One indication can be seen on your event’s URL as shown in the example below.
• In the API Endpoint field, select from one of the dropdowns of either:
a. Asia Pacific (APAC)
b. North America (NA)
c. Europe, Middle East, Africa (EMEA)
• If the dropdown options are not applicable to you, use the Endpoint Override field to populate your relevant Endpoint hostname provided to you by Aventri.

Note: To learn more about Aventri platform integration, please click here to access Aventri API documentation
2.6 Next, you will see a dropdown menu, which enables you to select how you would like to import your Aventri sessions to your CrowdComms Event App. The options are:
a. Managed Schedule – Your Aventri session will be imported to your delegate’s tailored agenda. Please refer here to read more about Managed Schedule.
b. Personal Agenda – Your Aventri session will be imported to your delegate’s favourited agenda. Please refer here to read more about Personal Agenda.
2.7 If you do not intend on setting up the Mapping of custom fields, you can select the Enabled checkbox now. Otherwise, leave this unchecked until you have finished configuration.
2.8 Once all relevant fields on the Dashboard are populated, click ‘Save’.

3. Automatic Mapping from Aventri to CrowdComms
3.1 Upon successful integration, essential event sessions and delegate information will be imported from Aventri to the CMS Dashboard.
3.2 The event sessions which will be imported are:
a. Session name
b. Session time – If no start and end times were set on the Aventri session, the event start, and end times will be applied by default
3.3 The following delegate information will also map across by default:
a. Delegate’s first name
b. Delegate’s last name
c. Delegate’s email
d. Delegate’s company
e. Delegate’s job title
4. Mapping of Custom Fields from Aventri to CrowdComms
4.1 You can import other information from Aventri to CrowdComms, including additional delegate information or other custom fields which you have added to your Aventri account.
4.2 To do this, once you have created a successful integration, click on the ‘Custom Fields’ tab.
4.3 To map data from Aventri to your Dashboard, click ‘Create new field mapping.’
4.4 The ‘Aventri Field’ dropdown will display additional data that has not already been mapped automatically, which you can manually map to the Dashboard. Some examples include:- Address, telephone, and other custom fields which you may have added in Aventri.
4.5 You can choose where you want to map the selected Aventri data by selecting from one of the types below:
a. People Group
b. Custom Field
c. Profile Field
4.6 Please note that only Aventri’s Categories can be mapped to the CrowdComms’s People’s Group
4.7 Based on the ‘Type’ field that you select, only the selected field will be available, and the other two will be unavailable.
4.8 Click ‘Create’ to add customer mapping and click ‘Save’ to retain your configuration.
4.9 Repeat steps 3 – 7 to map additional fields.
4.10 Navigate to the ‘Account Details’ tab, check the ‘Enabled’ checkbox and click ‘Save’ to begin syntonisation of data between Aventri and CrowdComms.

5. Setting up Webhooks to enable continuous synchronisation between Aventri and CrowdComms
5.1 The purpose of these steps is to allow continuous synchronisation of data from Aventri to CrowdComms after the initial integration set up. It includes new users who register after you’ve set up your integration and existing users who updates their information in Aventri.
5.2 To do this, log into your Aventri account
5.3 On the top left-hand side of the screen, click the hamburger menu icon and select ‘Settings,’ followed by ‘Account Settings’
5.4 Navigate to ‘Integrations’
5.5 Copy your ‘Account key’
5.6 Scroll down to the ‘API Event trigger’ section and ensure that:
a. ‘Event Scenario’ is set to ‘Event Created/Modified’
b. ‘Content type’ is set to ‘application/x-www-form-urlencoded' (important)
5.7 Check the box that says ‘Sign Payload (Using JWT)’
5.8 In the new ‘Secret Key’ field that appears, paste the ‘Account key’ you copied earlier
5.9 Paste the following URL into the ‘Specify URL’ field: https://api.crowdcomms.com/cms/integrations/aventri/webhook/
5.10 Click ‘CREATE/UPDATE TRIGGER’
5.11 Copy your ‘Account key’ again
5.12 Click the menu on the top left, select ‘Events’, then ‘View all events’ and select the event you are integrating to your CrowdComms app
5.13 Click the pencil icon beneath the Event title, hover over the ‘Adv. Settings’ tab and select ‘Integrations’
5.14 Ensure that:
a. ‘Attendee Scenario’ is set to ‘Registration / Modification’
b. ‘Content type’ is set to ‘application/x-www-form-urlencoded' (important)
5.15 Check the box next to ‘Sign Payload (Using JWT)’
5.16 In the new ‘Secret Key’ field that appears, paste the ‘Account key’ you copied in step 4
5.17 Paste the following URL into the ‘Specify URL’ field: https://api.crowdcomms.com/cms/integrations/aventri/webhook/
5.18 Click ‘CREATE/UPDATE TRIGGER’
Zoom Integration Setup Guide
Alternative Approach: Streaming Zoom into CrowdComms
If you prefer to live stream a Zoom session straight into the CrowdComms video player which benefits from recording the session on demand in the CrowdComms video library, you can see steps to live stream Zoom here. Details on how to use the CrowdComms live stream module can be found here, this supports being able to include a stream from Zoom, can be found.
This is an alternative approach that bypasses the integration between CrowdComms and Zoom and uses stream keys to host the Zoom meeting in the CrowdComms platform.
Zoom Integration Guide
This guide covers how to integrate your Zoom account to link both your Zoom Meetings and Zoom Webinars to seamlessly sit within the CrowdComms player. Please note, you can run a maximum of two parallel Zoom sessions at once using the integration.
Important: Zoom integration requires the sessions and webinars to be recorded on Zoom. The recordings will not automatically be available in the CrowdComms video library, however the Zoom recording can be uploaded after the session to the CrowdComms video library for on demand viewing.
To integrate Zoom into our platform, you will need access to the following;
- CrowdComms Content Management System (CMS) Dashboard
- The Event App platform
- A Pro, Business or Enterprise Zoom account
N.B. The Zoom API and Client SDKs are not available to Basic Accounts. If you have a basic account and want to set up an integration with our platform, you will need to speak to Zoom directly to discuss upgrading your account. If you are not the account owner or an admin on the account, you may also need to check that you have been given developer privileges.
Please note: If you are looking to use Zoom to run concurrent meetings, there are some limitations on Zoom's side, so please see these best practices before deciding if this setup will work for you.
Step 1. Zoom Developer Platform
- Once you are logged into Zoom Marketplace, you will need to navigate to ‘Develop’ at the top right-hand menu of the page and click ‘Build App’ from the dropdown.

2. Then click on the ‘Meeting SDK’ tile, and you will be presented with a prompt where you add the App Name.

3. You'll now be shown the configuration page for the app. Start by filling in the required information on the 'Information' menu before selecting 'App Credentials.
4. Please note the Client ID and the Client Secret to paste into the CMS later.
5. Add the following redirect URL: https://api-cms.crowdcomms.com/cms/integrations/zoom/redirect-callback/
6. Add the following whitelist URL: https://api-cms.crowdcomms.com/
7. When you get to 'Scopes', click the plus to 'add scope'. Select the option to 'view and manage all...' for both meetings and webinars respectively, depending on what you are using.

8. Click 'Done' and then 'Continue'
9. Now the app should be configured for integration. Scheduling the meetings/webinars to be imported into the CrowdComms platform will be done through the normal Zoom process.
Please note: As the integration is set up by one central person's Zoom account, we recommend using the 'alternative hosts' option, so that whoever is running each specific meeting is able to start it. You will need to then communicate the meeting link with them as you would outside of the platform.
Step 2. CMS
1. Log into the CrowdComms CMS Dashboard with your credentials.
2. Select the App you wish to create the Zoom integration.
3. Click on Plugins
4. Then, click on Zoom

If you have an existing integration, created via the old integration setup using JWT keys, you do not need to unlink your integration. To avoid losing existing data, simply update the Client ID and Client Secret fields using the new credentials obtained in Step 1 and click 'Save changes'
5. Paste the Client ID (API Key) and Client Secret (API Secret) you took note of earlier
Please note: If you forgot to make a note of this earlier, you can go back to the developer platform and find them here.
6. Click on 'Authorise'
Please note: Your browser will need to allow popups in order for the authorisation to work. This is to generate the success message. Without this, the CMS will generate an error and you won't be able to import your meetings.
7. You will receive a successful authorisation message (If authentication has failed, see troubleshooting section)
8. Click on 'Libraries'
9. Click on 'Zoom meetings and Webinars'

10. Click on the 'Import Meetings & Webinars' 
11. Select the meeting(s) and or Webinar(s) you wish to import (Switch between Meetings and Webinars using the TAB)
12. Click 'Import Now' (At this point you can select a meeting/Webinar and edit them. You can add an image and or change the description also - this change will only be visible in CC)
 13. Click on 'Builder'
14. Click on 'Agenda'
15. Select your agenda session and click on the 'Edit' icon
16. Click on the 'Embed' tab

17. Use the drop-down menu under 'zoom meetings & webinars' to select your meeting/Webinar
18. Click 'Save'. Your integration is now set up and ready to test via the front-end Event App.
Step 3. Event App Platform
1. Log into FE (Front-end) using your credentials
2. Go to the Agenda module
3. Click on the meeting/Webinar (NOTE; if you are hosting the meeting/Webinar, you will need to return to Zoom to start the session)
Please note: We advise that hosts join ONLY via zoom as normal to avoid any feedback loops/repeated audio. Zoom session details should be pre-filled for participants, allowing them to join the session.
4. Click on "Join meeting"

Please note: The host will have to start the meeting before anyone else is let in the meeting, and zoom controls on microphones and cameras etc will be there also, same as normal. Once the session is over you can simply 'leave meeting' in the usual fashion.
Best Practices
- Utilise the 'alternative hosts' feature
In zoom you can't start concurrent meeting from the same account unless you are a licensed user on an Enterprise, Business or Education account. With these accounts, you can run 2 meetings concurrently. The only thing to rememer with this is that you still can't be in two meetings at once, so one of them will need to have an alternative host added. You could either do this at point of setup, or you could start one meeting, make someone the host, leave and then start the other meeting. Please not that you can't use alternative hosts on both meetings. To run concurrent meetings you will need to be the host of one of them. Basic and pro accounts do not have this function and can only have one meeting at a time, regardless of the use of alternative hosts. You can find more info here on alternative hosts and running concurrent meetings. - Utilise Scheduling privileges
As only one Zoom account can be linked to a CrowdComms platform, this feature could be a good way to set up your meetings. This allows you to give privileges to another user or users to set up meetings on your behalf. You could give scheduling privileges to all users who need to run the meetings so they can set them up and also therefore act as an alternative host. this will require a bit more setup and the use of a plugin so please allow yourself time to set this up and test in enough time ahead of your event. To use this feature, both yourself and those you are giving privileges to need to be licensed users, or they can be sub accounts on your master account. For more information on this, please see here - Utilise zoom's own breakout feature
If this setup suits your needs, this will be the easiest to set up as you only need to set up one meeting in zoom which everyone can join through the platform. You will still need to set some things up in zoom first, but it will avoid the concurrent meetings issue. then people can breakout using zoom's own feature. You will need to be the account owner or have admin privileges to set this up and will need to enable breakout rooms via your account. You can assign people automatically, manually, or let participants choose. If you want to pre-assign people, then all users will need to have a zoom account. Be extra careful with this option as they would therefore need to be using the same email for the CrowdComms platform for it to work. Some useful links on this feature can be found here for enabling breakout rooms, managing breakout rooms & pre-assigning participants to breakout rooms.
Notes
- Meetings will show upcoming only (not previous meetings)
- Webinars will show both upcoming and previous Webinars
- Authenticated Webinars are not supported
- Two people can not both use the same Zoom account to be a host & a delegate (One would be timed out from joining the Webinar)
Troubleshooting
If you are have an error message when authorising the integration via the plugins page, please check the below with your setup in zoom:
CMS
- Check the redirect URL is correct
- Check that the whitelist URL is correctly filled in
- Make sure the JWT and OAuth are the correct way round
Front End
- Joining Zoom before the host has started the session will present you with a 'Joining meeting, timeout' message (Click 'Retry or Ok')
- If you are presented with a 'The session has expired or is no longer valid' message, click 'Retry'
If you still face trouble after going through this guide, please contact your support agent.
Useful Links
Developer Accounts
https://marketplace.zoom.us/docs/sdk/native-sdks/developer-accounts
User Role Management:
https://support.zoom.us/hc/en-us/articles/115001078646-Role-Based-Access-Control
Zoom User Types & Roles:
https://support.zoom.us/hc/en-us/articles/201363173-Account-types
Zoom Integration Vs Desktop Features
The main thing to remember with our zoom integration, is that it is not simply zoom as you know it via other means, but accessed via the platform. The integration uses what is called the zoom web SDK which has different features to the desktop client and mobile app.
More than likely, you are used to using the desktop client which has the most features. Below is a comparison of the features you can expect to find via the desktop client vs the web client, and therefore what you can expect to see via our integration.
Important: CrowdComms are not able to provide support with issues related to the Zoom meeting itself or restrictions with the Zoom SDK. We can assist with setting up the integration which will output your Zoom meeting seamlessly in the CrowdComms platform utilising the Zoom SDK functionality available.
As updates to the Zoom SDK are released, these will be updated to the CrowdComms / Zoom integration.
Feature |
Windows/macOS (Desktop Client) |
Platform Integration (Web Client) |
Start or join meeting |
||
|
✓ |
✓ |
|
|
Join a meeting in progress |
✓ |
✓ |
|
Sign in using Zoom account, Google, Facebook, or SSO |
✓ |
✓ |
|
Start an instant meeting. |
✓ |
✓ |
|
✓ |
|
|
|
Share your screen in a Zoom Room by entering in the sharing key or meeting ID. |
✓ |
|
|
Display upcoming meetings |
✓ |
|
|
Display synced calendar events (if you added a third-party calendar service) |
✓ |
|
|
View, edit, start, or delete your scheduled meetings |
✓ |
|
|
Participants are pre-assigned to breakout rooms (if set up by the host) |
✓ |
✓ |
In meeting controls (participants and hosts) |
||
|
Join computer audio |
✓ |
✓ |
|
Mute/unmute mic |
✓ |
✓ |
|
Start/stop video |
✓ |
✓ |
|
Invite others to join meeting |
✓ |
✓ |
|
Change your screen name for the meeting |
✓ |
✓ |
|
✓ |
✓ |
|
|
✓ |
✓ |
|
|
✓ |
✓ |
|
|
Start cloud recording |
✓ |
✓ |
|
Start local recording |
✓ |
|
|
✓ |
✓ |
|
|
✓ |
|
|
|
✓ |
✓ |
|
|
✓ |
✓ |
|
|
✓ |
|
|
|
Answer polls |
✓ |
✓ |
|
✓ |
✓ |
|
|
Live transcription |
✓ |
✓ |
|
✓ |
✓ |
|
In meeting controls (hosts and co-hosts) |
||
|
Create, edit, and launch polls |
✓ |
✓ |
|
Start and manage breakout rooms (host only) |
✓ |
✓ |
|
View pre-assigned participants in breakout rooms (if set up in web portal) |
✓ |
|
|
Live stream meeting |
✓ |
|
|
✓ |
|
|
In-meeting security controls (hosts and co-hosts) |
||
|
Lock meeting (don't allow other participants to join the meeting in progress) |
✓ |
✓ |
|
Place the attendee in a virtual waiting room |
✓ |
✓ |
|
Control if participants can share screen |
✓ |
✓ |
|
Control if participants can use in-meeting chat |
✓ |
✓ |
|
Control if participants can unmute or rename themselves |
✓ |
✓ |
|
Enable/disable video receiving |
|
✓ |
Webinar controls |
||
|
Launch question and answer session |
✓ |
✓ |
|
Launch polls |
✓ |
|
|
Live stream webinar |
✓ |
|
Manage participants (hosts) |
||
|
Stop a participant's video |
✓ |
✓ |
|
Assign a participant to be the host |
✓ |
✓ |
|
Assign a participant to be a co-host |
✓ |
✓ |
|
Allow a participant to start or stop a recording |
✓ |
|
|
Assign a participant to type closed caption |
✓ |
✓ |
|
Change a participant's name that is displayed to other participants |
✓ |
✓ |
|
Remove participant from meeting |
✓ |
✓ |
|
Mute all participants/ask all to unmute |
✓ |
✓ |
|
Automatically mute participants as they join the meeting |
✓ |
✓ |
|
Play chime when participants join and leave |
✓ |
✓ |
|
Don't allow other participants to join the meeting in progress |
✓ |
✓ |
|
Control who participants can chat with |
✓ |
✓ |
|
Put a participant on hold |
✓ |
✓ |
Share screen controls |
||
|
Share whiteboard |
✓ |
|
|
Share device audio |
✓ |
|
|
Annotate on shared screen or whiteboard |
✓ |
|
|
Pause your current shared screen |
✓ |
✓ |
|
Show or hide names of annotators |
✓ |
|
|
Stop a participant's screen share (host and co-host only) |
✓ |
|
|
Control if multiple participants can share screen simultaneously |
✓ |
✓ |
|
✓ |
|
|
Profile |
||
|
✓ |
|
|
|
Change profile photo or screen name |
✓ |
|
|
Manually change your status |
✓ |
|
Chat |
||
|
✓ |
|
|
|
✓ |
|
|
|
✓ |
|
|
|
Save images or files sent in the chat |
✓ |
|
|
Add messages to your starred list and view all messages you have starred |
✓ |
|
|
View starred messages in a specific chat |
✓ |
|
|
Use your personal chat space |
✓ |
|
|
✓ |
|
|
|
View all files sent or all files received in chat |
✓ |
|
|
Share sent or received chat files with contacts |
✓ |
|
|
✓ |
|
|
|
✓ |
|
|
|
✓ |
|
|
|
Send emoticons |
✓ |
|
|
✓ |
|
|
|
✓ |
|
|
|
Invite contacts to an existing chat |
✓ |
✓ |
Channels |
||
|
✓ |
|
|
|
Add channels to your starred list and view channels you have starred |
✓ |
|
|
✓ |
|
|
|
Edit a channel (must be a channel admin) |
✓ |
|
|
✓ |
|
|
Contacts |
||
|
✓ |
|
|
|
Add contacts to your starred list and view contacts you have starred |
✓ |
|
|
Directory for contacts, channels, and Zoom Rooms |
✓ |
|
|
Add contact to auto-answer group |
✓ |
|
Settings |
||
|
Automatically join meeting by computer or device audio |
✓ |
|
|
Automatically mute when joining meeting |
✓ |
|
|
Automatically call phone number to join meeting |
|
|
|
Insert a link preview whenever a chat message contains a link |
✓ |
|
|
Change notification settings for chat |
✓ |
|
|
Manage blocked contacts |
✓ |
|
|
Display meeting reminders |
✓ |
|
|
Display connected meeting time |
✓ |
|
|
Display closed captions (if available) |
✓ |
|
|
Automatically disable your video when joining a meeting |
✓ |
|
|
✓ |
|
|
|
✓ |
|
|
Note (A): Joining computer audio on Safari is only available for webinar attendees.
Note (B): Screen sharing on Microsoft Edge requires Windows 10 Pro or Enterprise. It is not supported on Windows 10 Home. If you are running Windows 10 Home and need to share your screen, we recommend using Chrome or Firefox. Screen sharing is not supported on Safari.
Note (C): If you joined a meeting on an iOS or Android device, you can't request remote control or give remote control. The participant who is screen sharing with the Zoom desktop client must give you remote control.
Note (D): Requesting remote control of content shared from the desktop client or mobile app is currently supported, but not content shared from another web client.
Note (E): Self-selection on the Zoom mobile app and ChromeOS is available for meeting participants, but not for the host launching breakout rooms. Self-selection of breakout rooms has to be enabled and launched from the desktop client.