6.3. Networking: Badges and Passes (QR Code)
- Activating and Deactivating Badges & Passes
- Designing and Editing Badge
- Importing 3rd Party QR code into CMS
- Using the QR Scanner and Adding Contacts
Activating and Deactivating Badges & Passes
• Log into CMS with credentials
• Select App
• Click on “Settings”
• Click on “Features” (Scroll down to “Badges”)
• Slide the toggle ON or OFF as required
• Click “Save”

• If the toggle is turned off your client will see the teaser page in the Libraries -> Badges and Passes

Designing and Editing Badge
• Click on “Libraries” in CMS
• Click on “Badges & Passes”
• Click on “Add a new badge”

• Fill out fields as required.
(Note: A preview of the badge will display update as you design/edit the badge (Profile picture, job title and company will however not update on the preview)

1. Badge Name (This can be anything and will only be shown in the list in CMS)
2. The header can be either an image or a colour
3. Select what you would like displayed on the badge; Event Logo, Profile Image, Job title and Company (Note; the Event Logo displays over the header)
4. If you would like a custom label on your badge, then turn the custom label toggle ON. You will then be able to type in the custom label and the background/text colour of the label
5. Select which group the badge is shown to (People groups determine who this badge is applied to. If a person is 'matched' with multiple badges, the priority of the badge decides which one is displayed.)
6. Click “Create” to create and save the badge.

• You can then find your newly created badge in the “Badges/Passes” list
(Note: In the list you can search for badges, reorganise the badges by clicking and dragging them in the list and you can also delete badges from the list)

Importing 3rd Party QR code into CMS
• Go into the 3rd party registration platform, such as Entegy
• Import the attendee profiles including, their name, organisation, job title and badge reference
• Log into CMS > Libraries > People > Import/Export TAB and download the example template
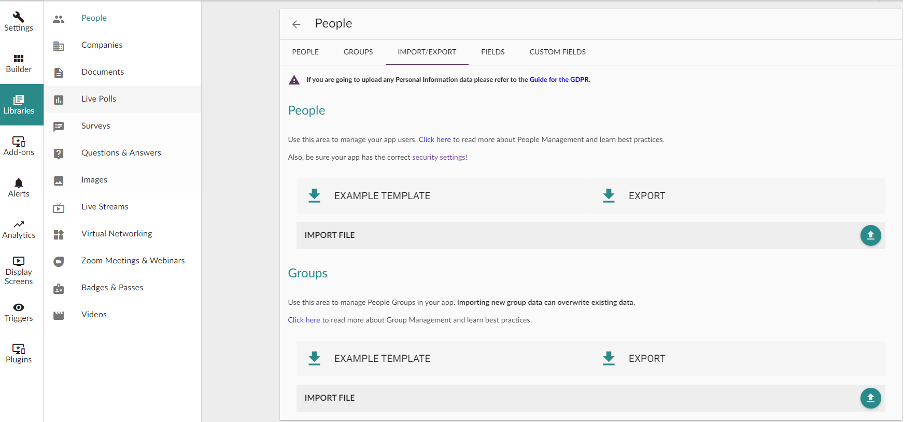
• Populate the template sheet with the information from the 3rd party import sheet
• Then import the completed file into CMS
• During the import, you may get an error message if an attendee already exists in the app or there is missing information from your template sheet
• Go to the people TAB and you should be able to see all the imported attendees
• You can search for a specific attendee or click “Edit” on any one of them to check and ensure that relevant attendee information is imported
• Check that the QR code ID field is populated with the correct 3rd party code
• Click Save
NOTE: You can also export CMS QR Codes into a 3rd party platform. Please refer to the specific platform’s own guidance.
Using the QR Scanner and Adding Contacts
• To use the QR code scanner, the user must log in to their event app on their device
• Go to the right-hand side drop down menu and click on “Event Connections”

• Click on the “Scan” button

• Allow device access to the camera
• The user can then scan another delegates/attendees QR Code
• If the QR code belongs to a delegate who is registered in the event app, the user will receive a “Successfully Added” message
• A newly added contact will appear on the Event Connections list

• The user can then either; call (Voice & Video), email, chat or visit the website of the new contact if they have this information available on the contact card
• The user can search for a contact or reorganise the list either according to recently added or alphabetically
• The user can also delete a contact by clicking on the 3 dots on the contact card and clicking on delete
