Skip to main content
PWA Initial Set-Up on Dashboard
- Log into your CrowdComms dashboard (CMS) and input your details.
- Select the Event App that you would like a PWA to be set-up on.
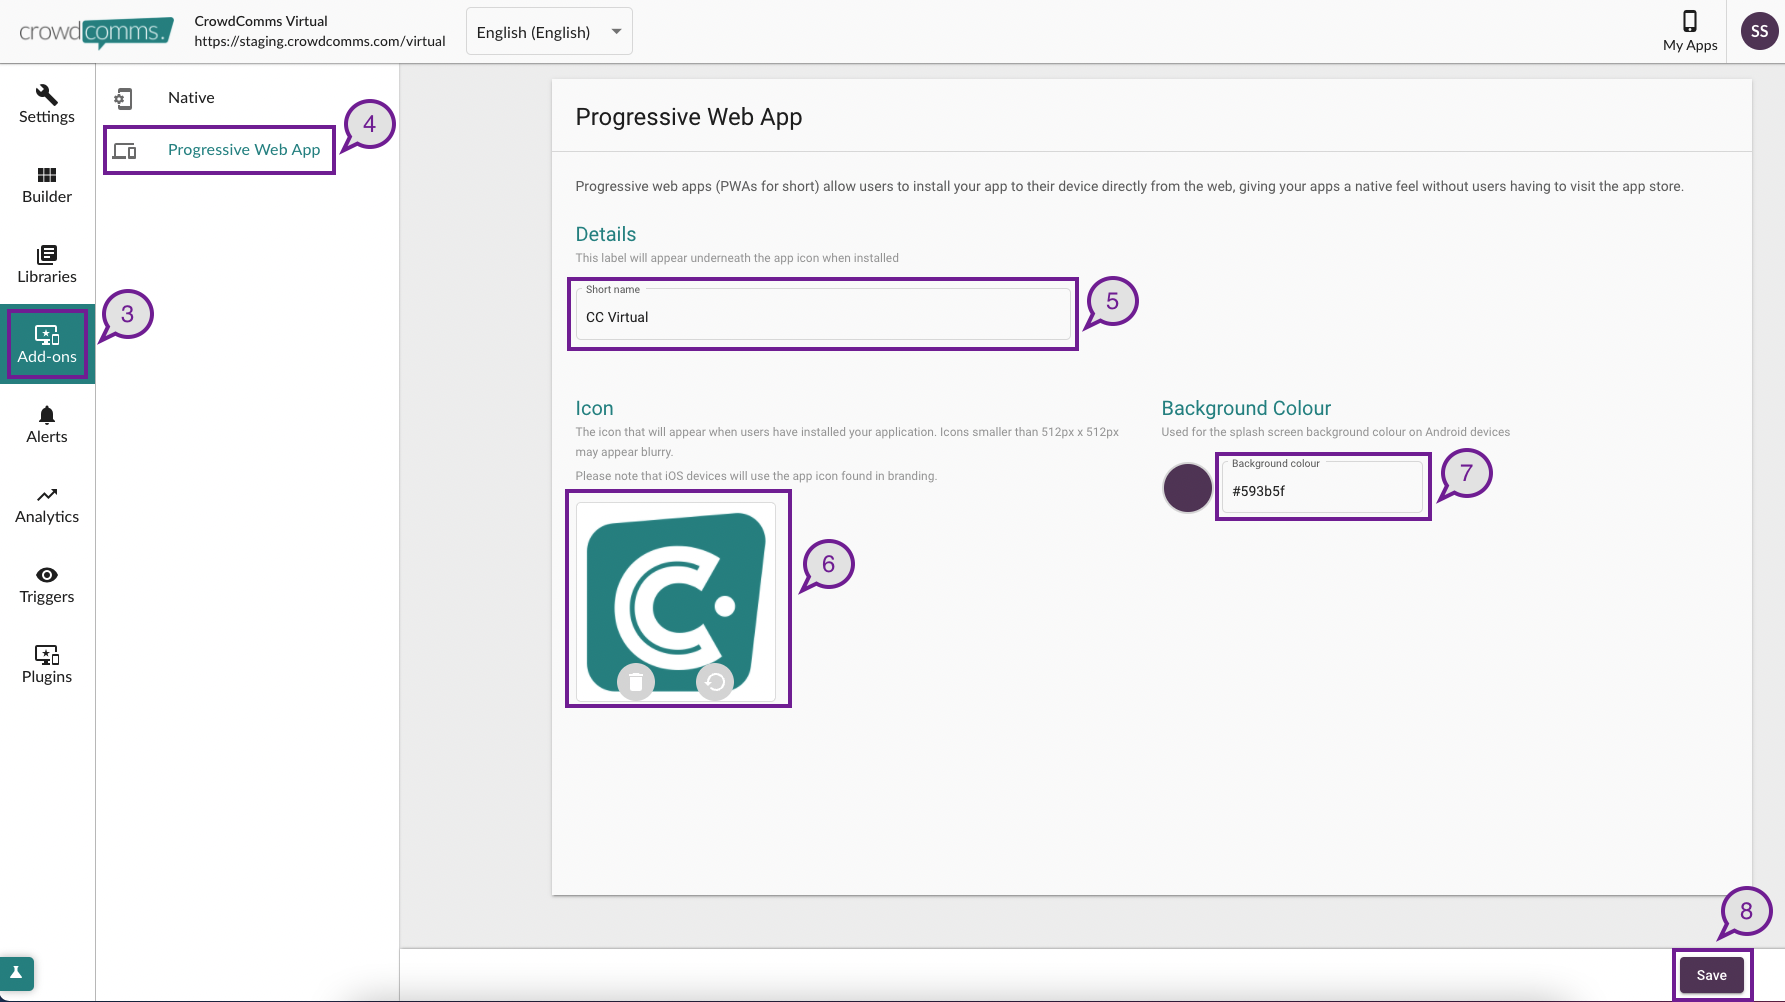
- Within the ‘Add Details’ landing page, click on ‘Add-Ons’ from the left-hand menu.
- Click on ‘Progressive Web App’ that appears as an option in the secondary menu to the right.
- Type the name you want the App to be called in the ‘Short name’ field. This should be a concise name, as it will appear at the bottom of the App – there is a character limit of 12 in this field. You could choose an acronym or a short event-specific name that your attendees will instantly recognise.
- Below the name field you will see an option to upload an image and this image will become the icon for your event. Company logos and event branding work well here (we suggest an image size no larger than 512 x 512 pixels). Please note that your App icon will only appear on Android, macOS and Windows. To ensure that your App icon matches across IOS devices*, the icon image will need to be additionally uploaded on the ‘Branding’ page for your event.
- Within this window, you are also able to select a colour for your splash screen background. This will be the splash screen colour for any Android devices.
- Click ‘Save’