Step five: Libraries
Overview
The libraries are the main area you will be importing your content to. Think of this area as where the data sits and the modules are how we display it.
People People
A good place to start is uploading your people groups and associated profile information. You can find guidance on the People module here.
You have the option to manually add people one at a time or easily bulk import via csv or excl.
Users have controls at login to choose if they would like to be visible in the platform and to update their profile.
You have the option to manually add people one at a time or bulk import via csv or excl.
Templates are available and custom fields allow you to build upon the default options that include first name, last name, email, job title and company.
Creating and allocating users to groups allows you to personalise what they can see on the home page, menu and in the agenda. You can also send targeted comms to specific groups.
Important: Integration options are available to automatically transfer your approved platform users from registration or other systems. Discuss your requirements with your account manager or support manager to confirm the best option available.
Once you've imported your users, you can go back to the modules section and choose which groups appear in each 'People module'.
You will also be able to select at module level, who can see this section.
Companies
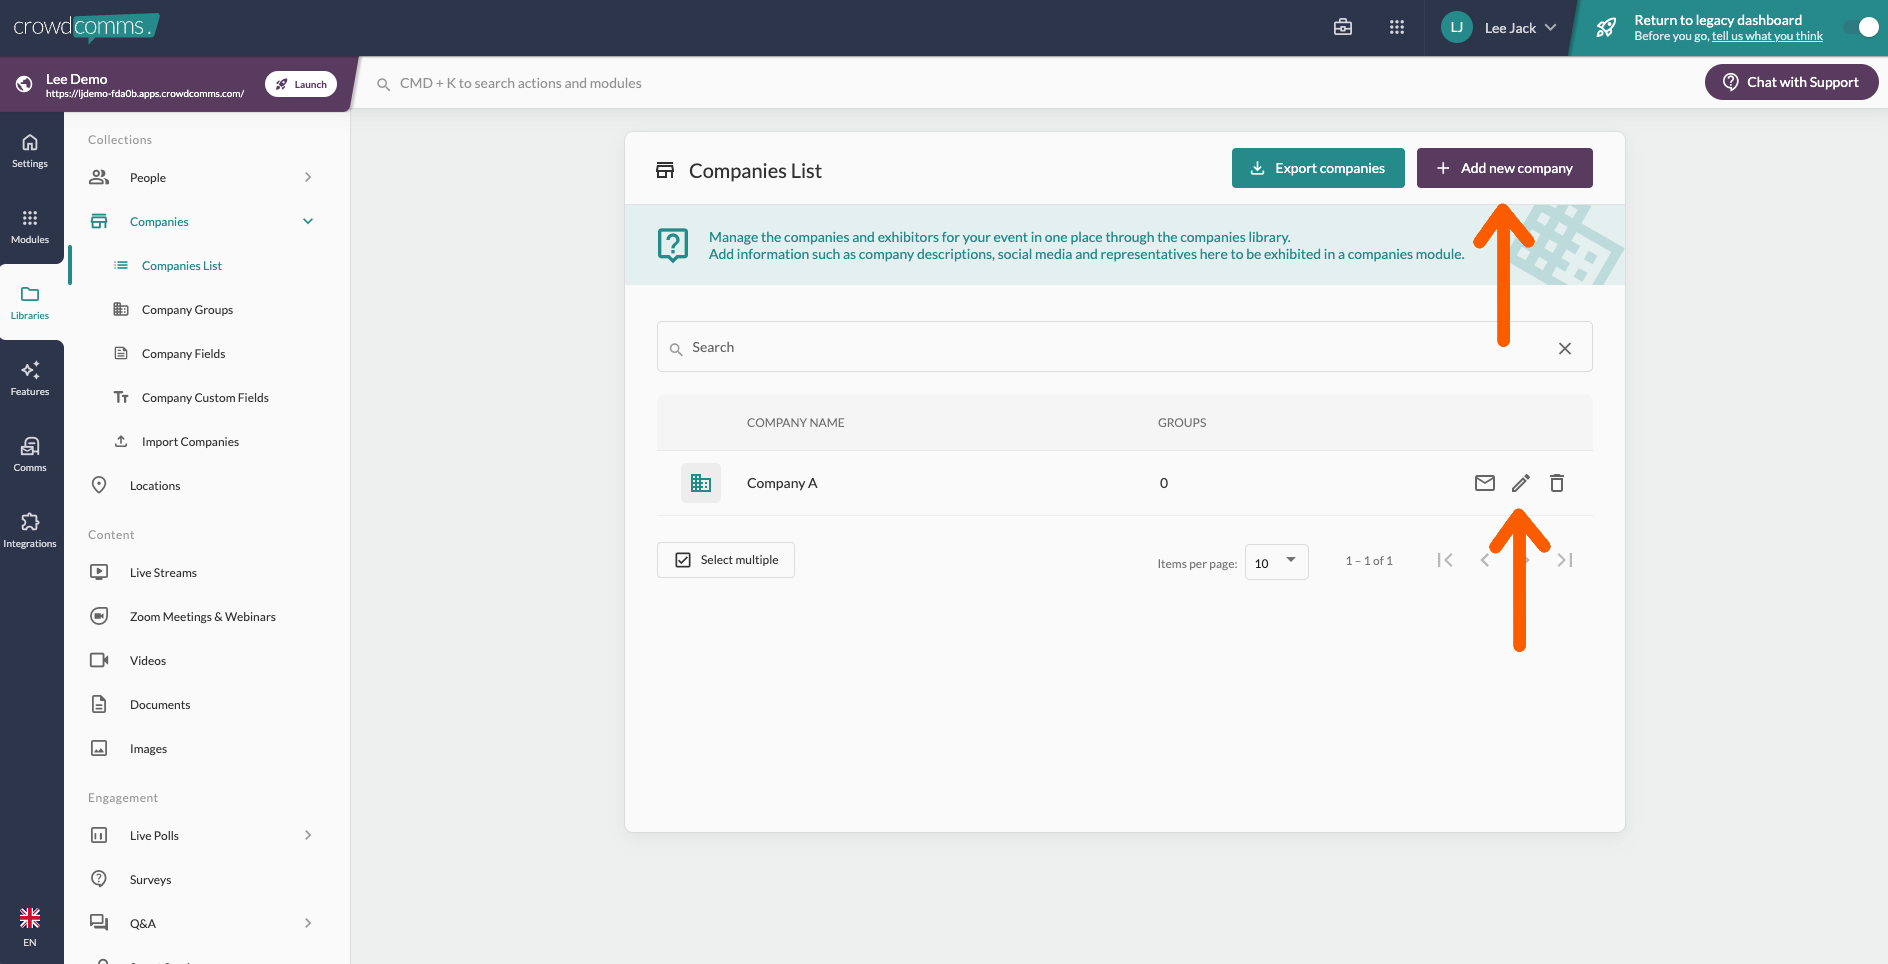
The Companiescompanies tab gives you the same option to add manually or bulk import. You can also invite your sponsors and exhibitors to self edit their company profiles by providing a back end edit link to their profile pre-event so they can add and change design and content directly without creating you a heap of work to do!
You can find guidance on the Companies module here.profiles.
You will need to create their profile (Name only) and link a main representative first.
To bulk import the companies, export the Companies spreadsheet and fill the data. This can then be imported back into the CMS.
Locations
The location library gathers together all the locations collected via pindrops and maps. Below is a video guide on this section.
Live Streams
The live streams library will house any live stream you have created on the platform and here you can also create live streams. Here is a video below with guidance.
Zoom Meetings & Webinars
Zoom meetings and webinars feature will only be necessary if you're using a Zoom integration. If so, this functionality should have been turned on and you will see it in your libraries. But if you're not seeing it either, let your account manager know or message us on chat with support and we can make sure that's toggled on for you. Please see the video guide below.
Videos and Documents
These both work in the same way, simply drag and drop the files to be available to link into various areas of the platform.
Click here to find out more about adding videos. Please view the guide below.
More information about adding documents can be found here and a helpful video guide is below
Linking library content to modules:
- Go to the relevant module (Company display, people display, engagement display i.e. live polls, Q&A, Game)
- Choose from the available options to determine what appears i.e. 'All people or 'Specific groups'
Images
The Image Library acts as a database of all the images you've uploaded to asset spaces within the platform. The video below details this area.
Engagement: Live Polls
You can find more information about Live Polls here
Here is a video guide
Please see the step by step guide below.
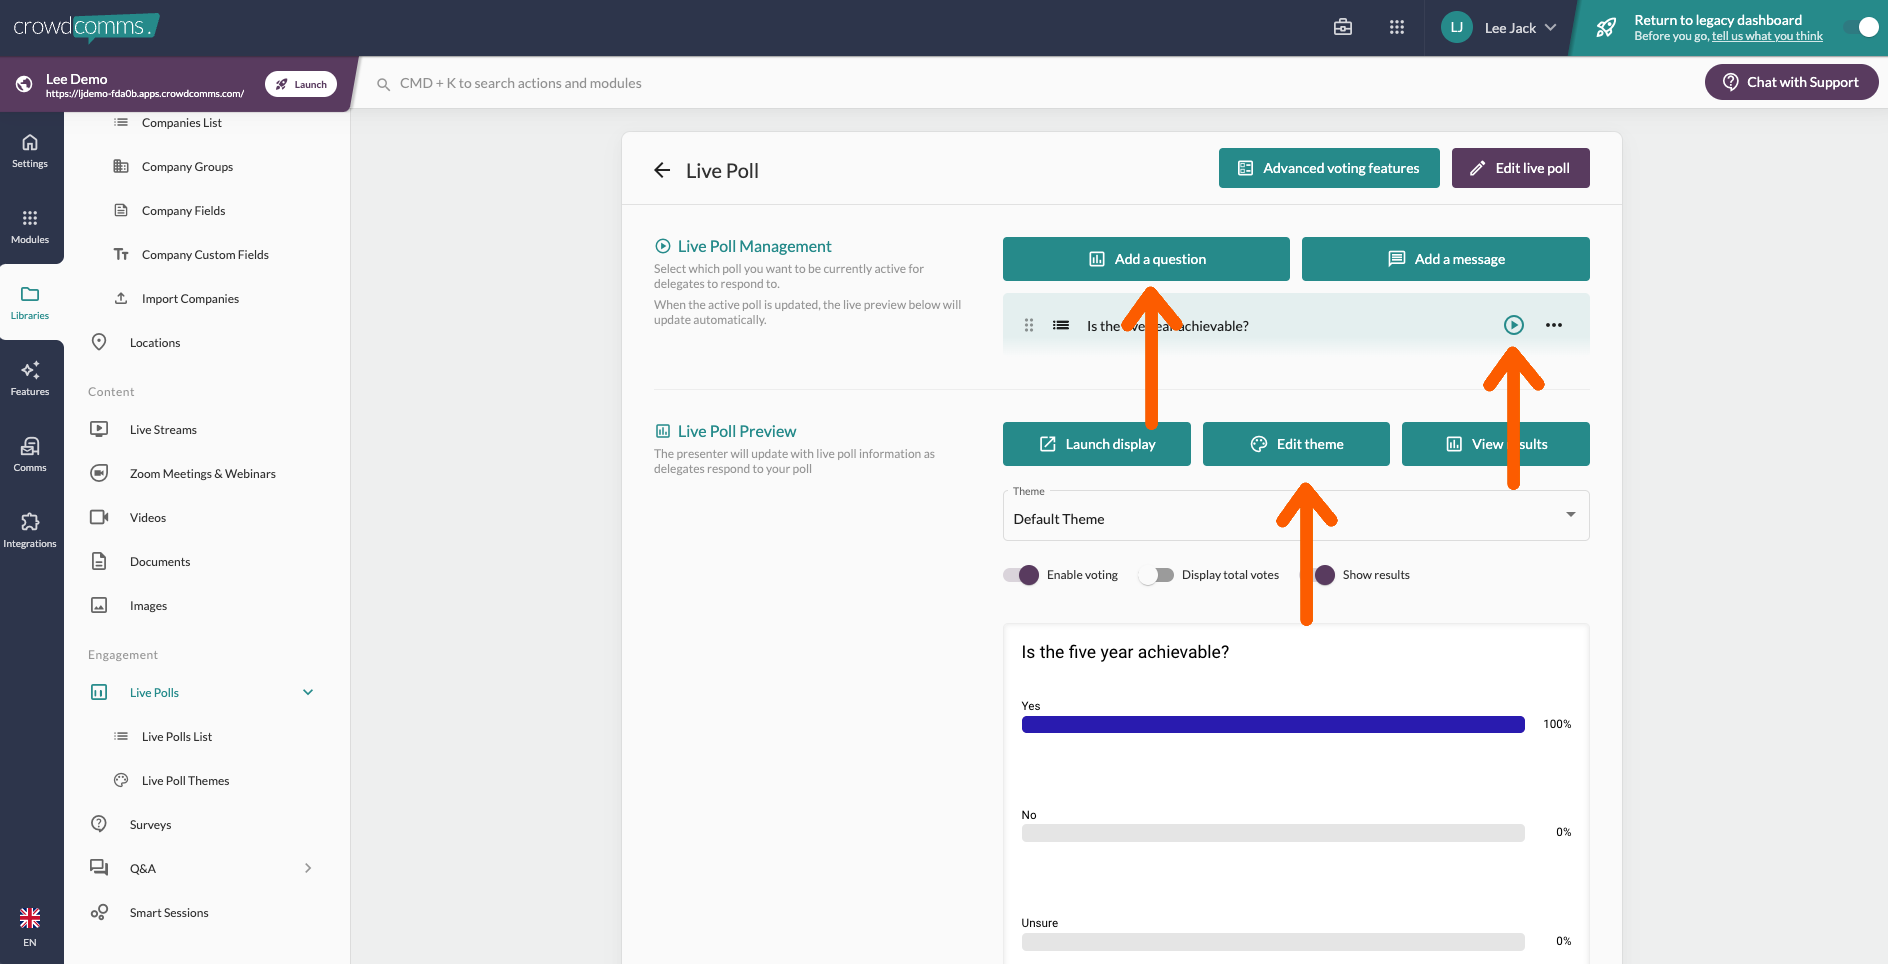
1. Create as many live polls as you need to link to sessions.
2. Create all your poll questions, customise the there, and choose which question to make live for delegates to vote on in platform. In this same section you can launch the live display to show the results update in real time on the branded display.
3. Link polls to a live poll modules or sessions. Go to agenda, select relevant session to edit, select features along the top, scroll down and link the relevant live poll.
Surveys
Here is a video tutorial on surveys
For more information about surveys, click here
Engagement: Q&A
Click here for more information about Q&A
Here is a video tutorial
Please see the step by step guide below.
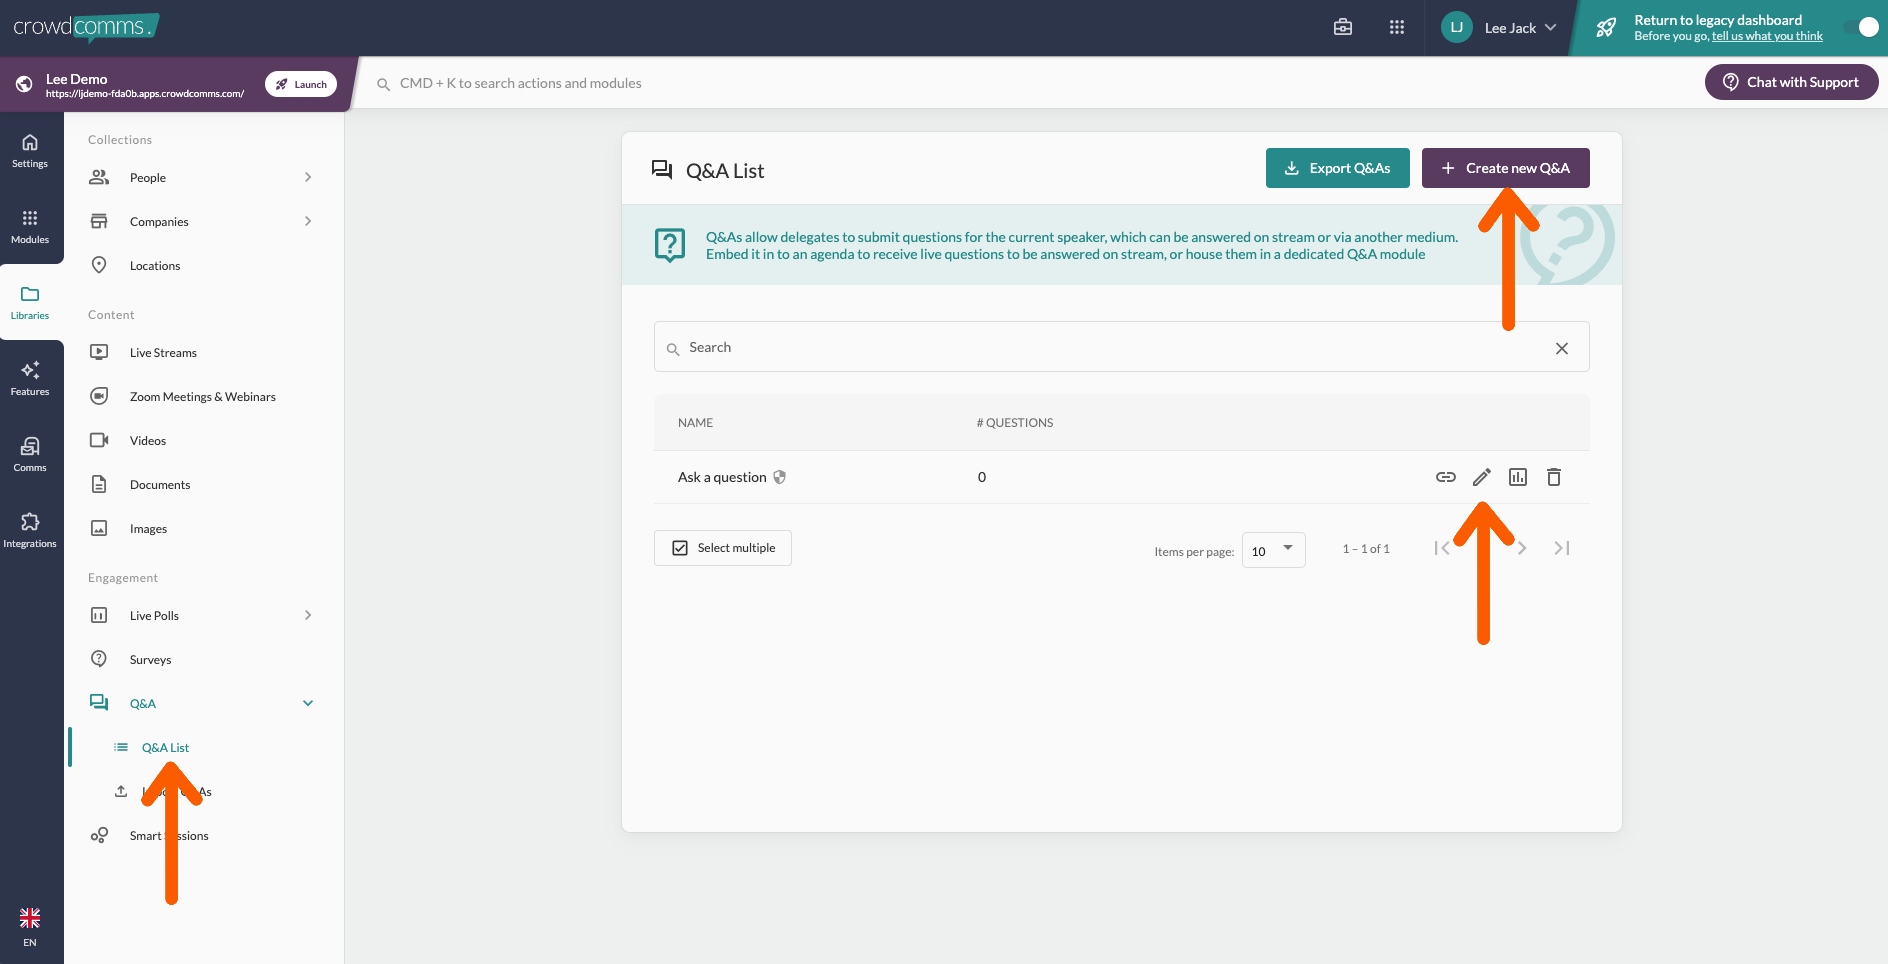
1. Create as many Q&A sections as you need to link to sessions.
2. You will be able to manage the Q&A during your event in the same section in the manage tab. This provides options for moderation, speaker view and a live display.
3. Link the Q&A's created to your sessions in the same way live polls are linked, shown above.
Smart Sessions
The Smart Sessions Libraries is where you can create the rooms that you then link through to the Smart Sessions module. The video below is a guide on this.
Return to the previous guide 'Step four: Building your agenda'


