Eventbrite Integration Setup Guide
Contents
- In and out of scope
- Access Requirements
- Integrating Eventbrite into dashboard (CMS)
- Custom Fields
- Useful Links/Notes
1. In and out of scope
In scope
- Attendee’s sync
- Limited default profile mapping (Incl: Title, First Name, Surname, Email and Telephone)
- Custom field mapping
- Updates made on attendee’s profile post integration being created
- One way sync between Eventbrite to CrowdComms
Out of scope
- Session currently doesn’t exist on Eventbrite
- Eventbrite profile fields (Incl: Job title, Addresses, Company, Website, Blog)
- Pre-existing attendees on Eventbrite will not sync to CrowdComms if created before integration
- Validation to ensure you are mapping the correct Eventbrite event to the correct CrowdComms app
- Two-way sync CrowdComms back to Eventbrite
- Group bookings using duplicate email addresses
2. Access requirements
Client will need access to the below to integrate with CrowdComms dashboard
- Eventbrite account
https://www.eventbrite.co.uk/signin/ - Access to CrowdComms dashboard > Plug Ins > Eventbrite
3. Integrating Eventbrite into dashboard (CMS)
3.1 Log into CrowdComms dashboard (CMS)
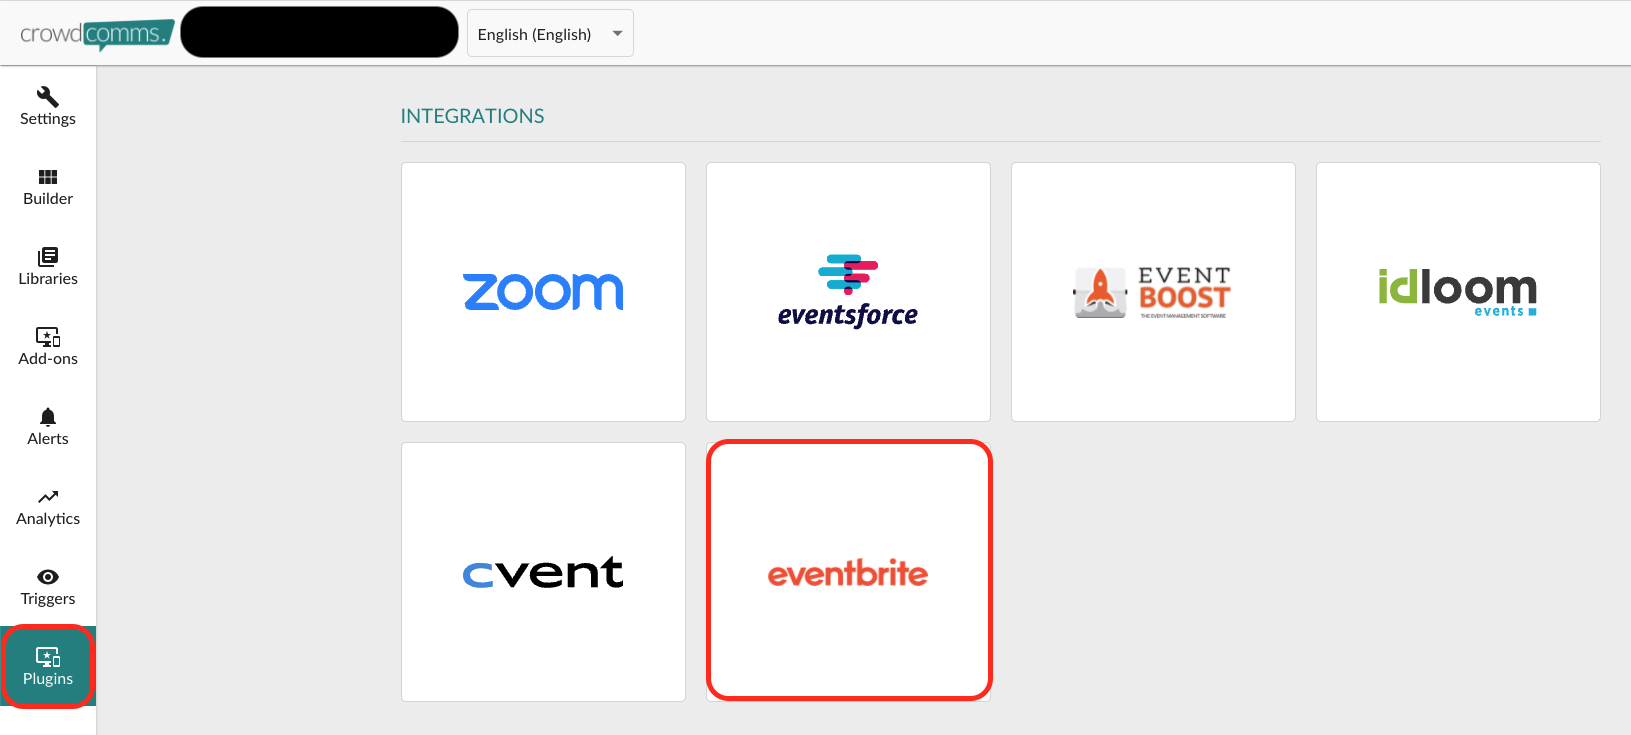
3.2 Select an App
3.3 Click on “Plug Ins”
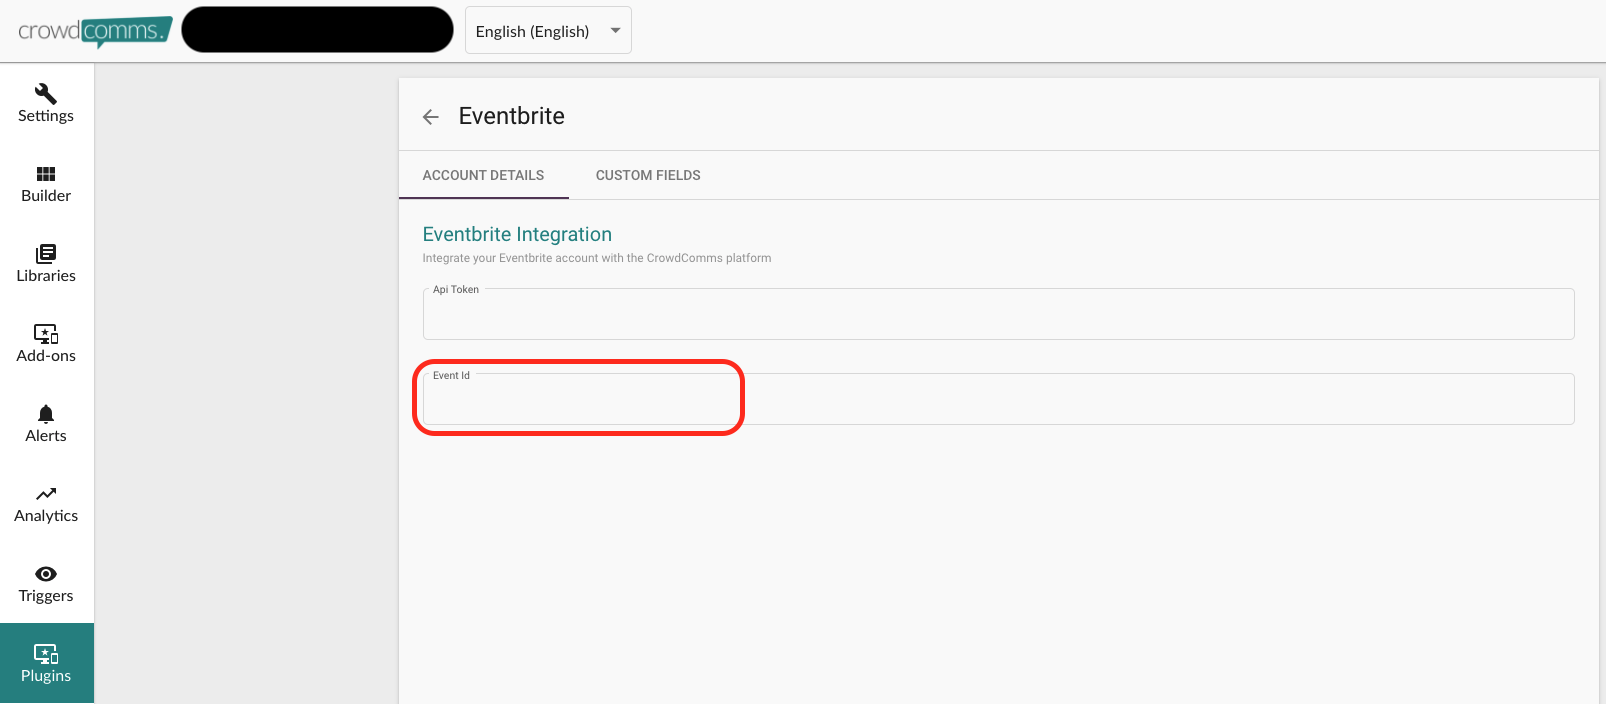
3.4 Click on the “Eventbrite” tile
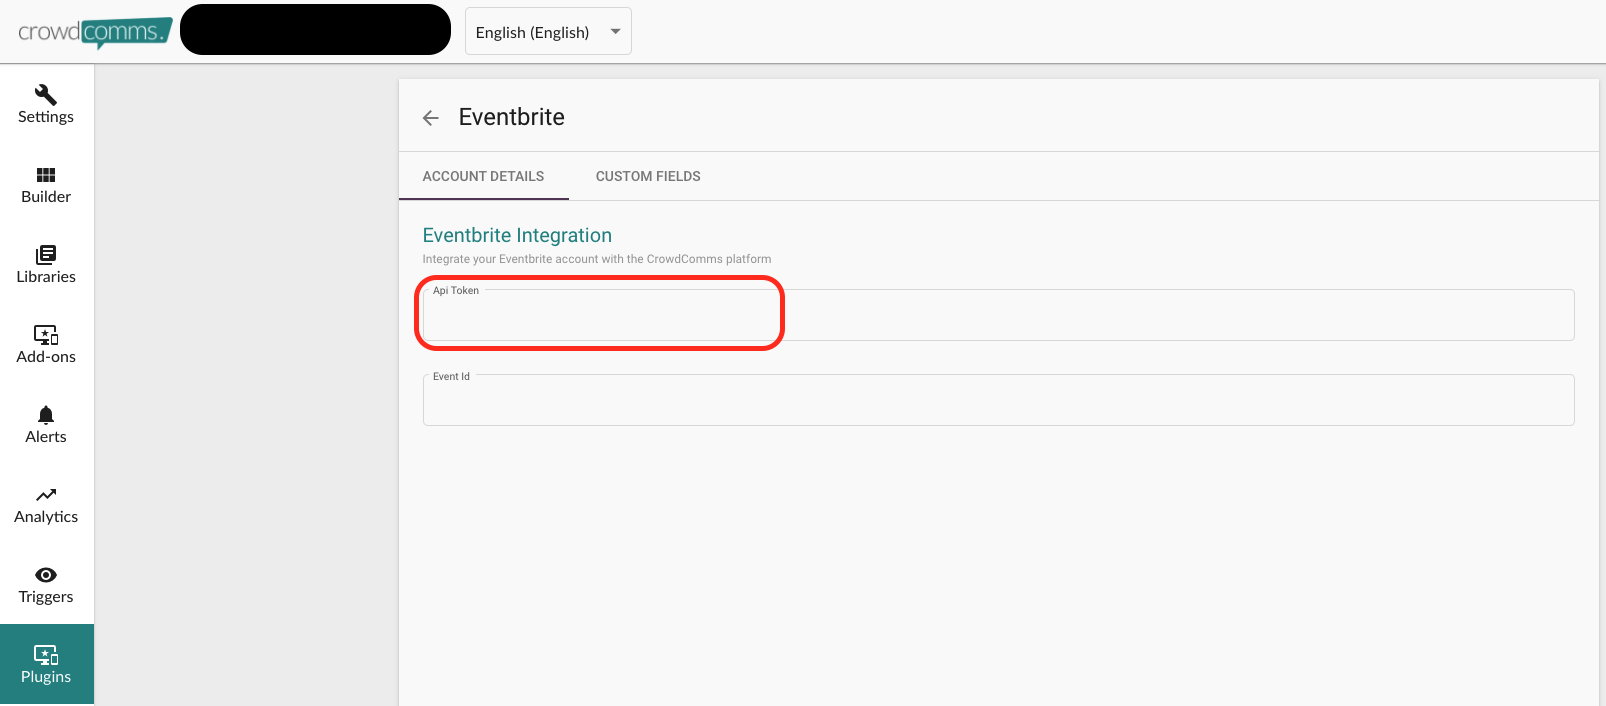
Note: The client will need to access their Eventbrite account to retrieve the API Token and the Event ID.
i. Log into Eventbrite account
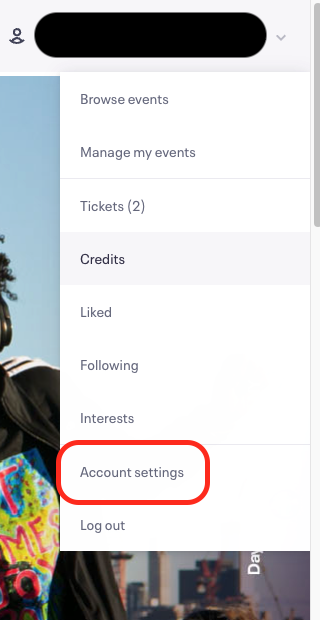
ii. Navigate to “Account Settings” on the dropdown from the right-hand menu
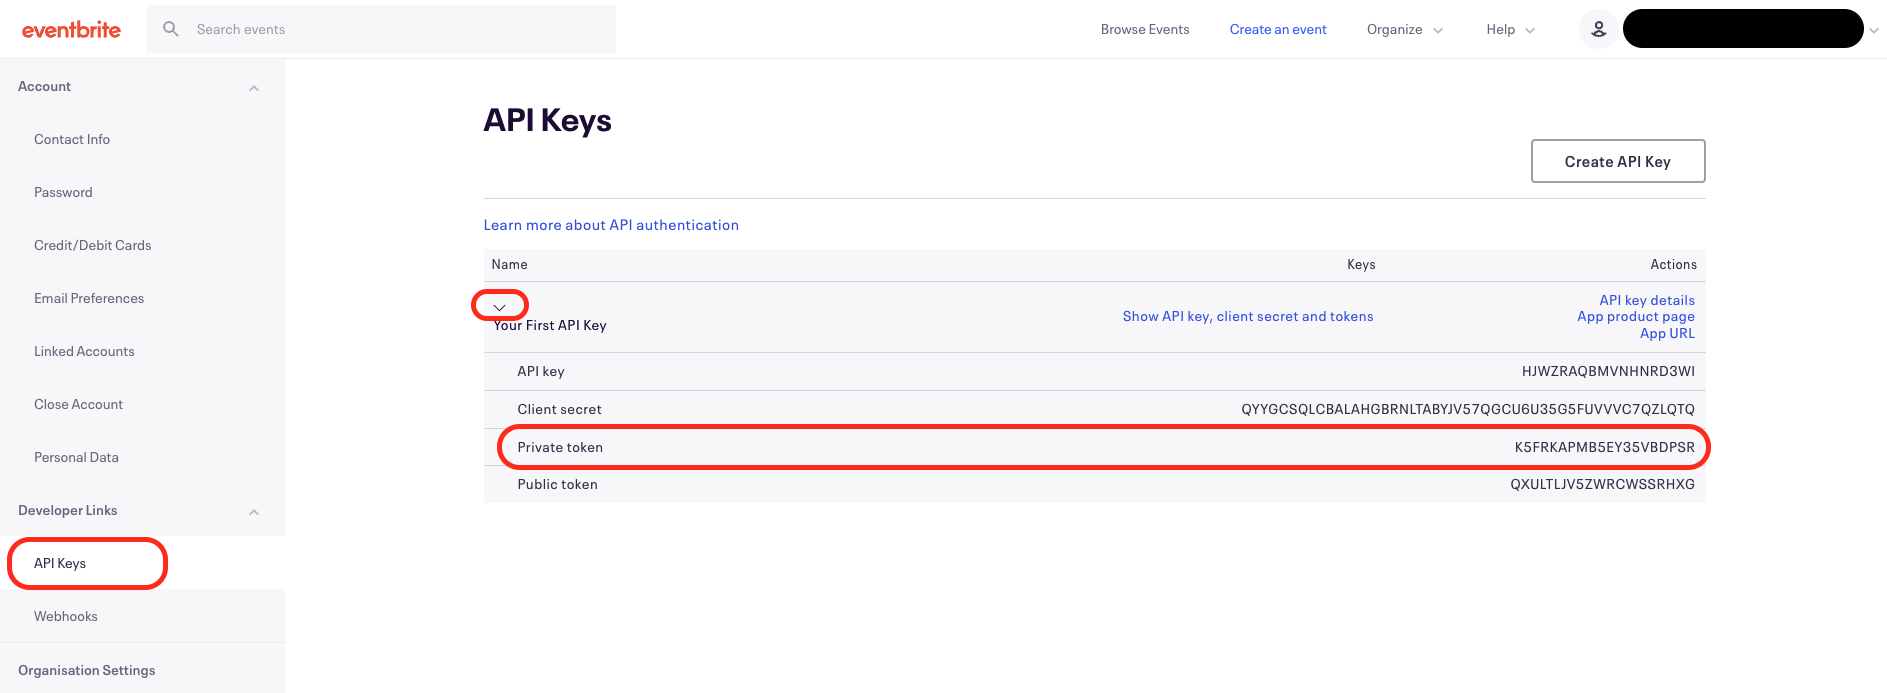
With existing API keys
Without an API key
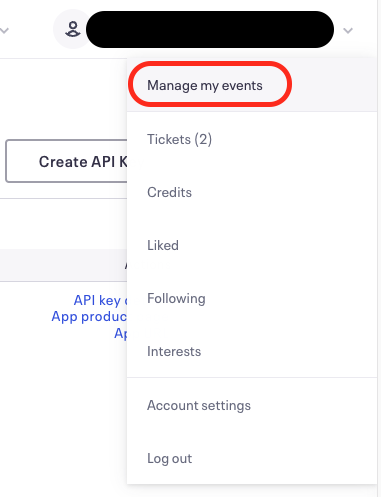
ix. To locate the Event ID, navigate to “Manage my events” on the dropdown from the right-hand menu
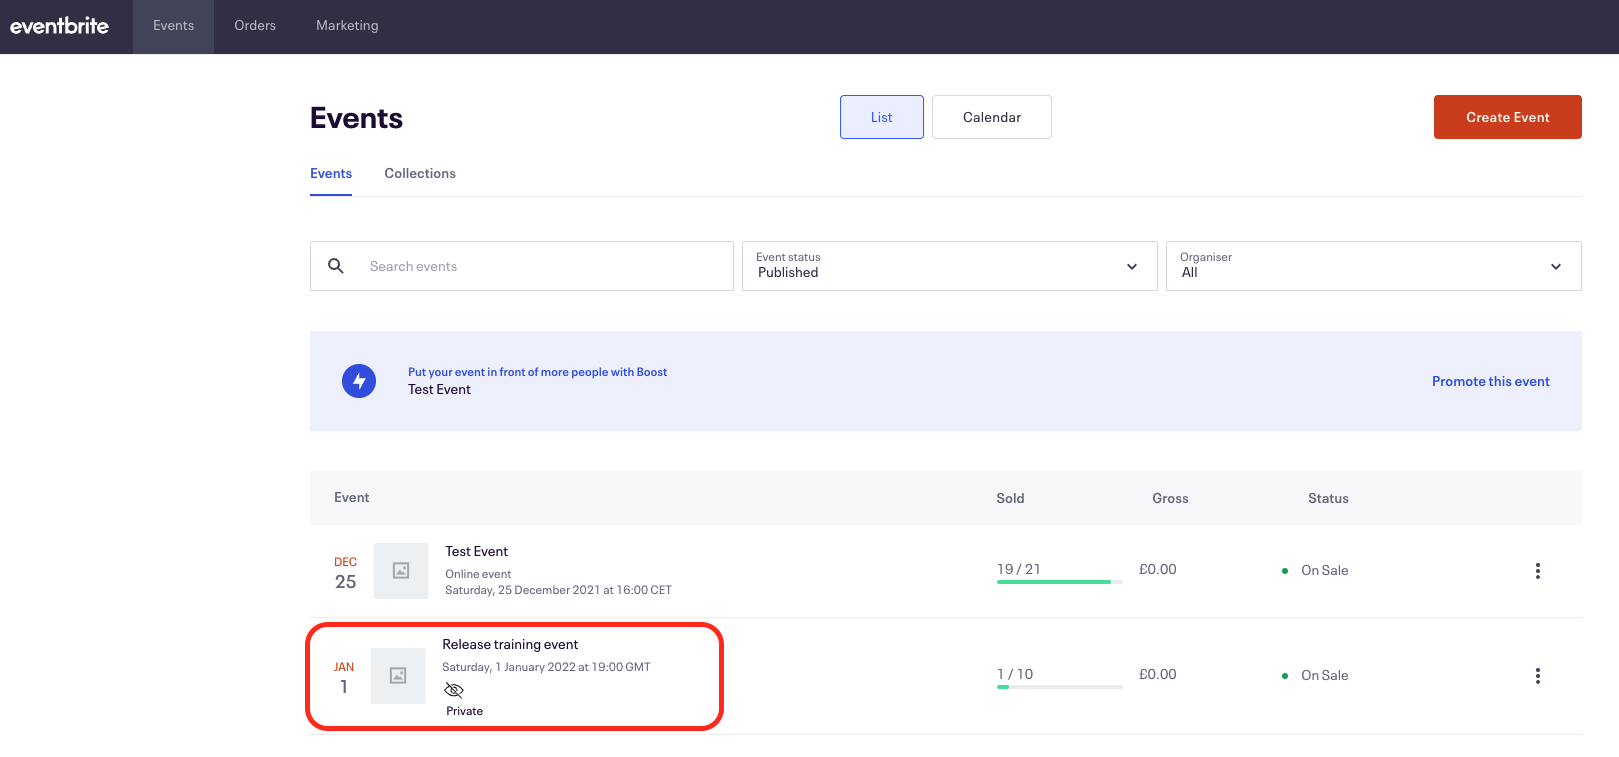
x. Select on the relevant event that you want to integrate with your CrowdComms app
xi. Scroll down to the bottom of Event Dashboard to locate the Event ID. Your Event ID can be found in the red highlight box as shown below:
xii. Record or copy the Event ID and populate the Event ID field on CrowdComms dashboard (CMS)
3.5 Once both “API Tokens” and “Event ID” fields on the dashboard (CMS) are populated, click “Save”
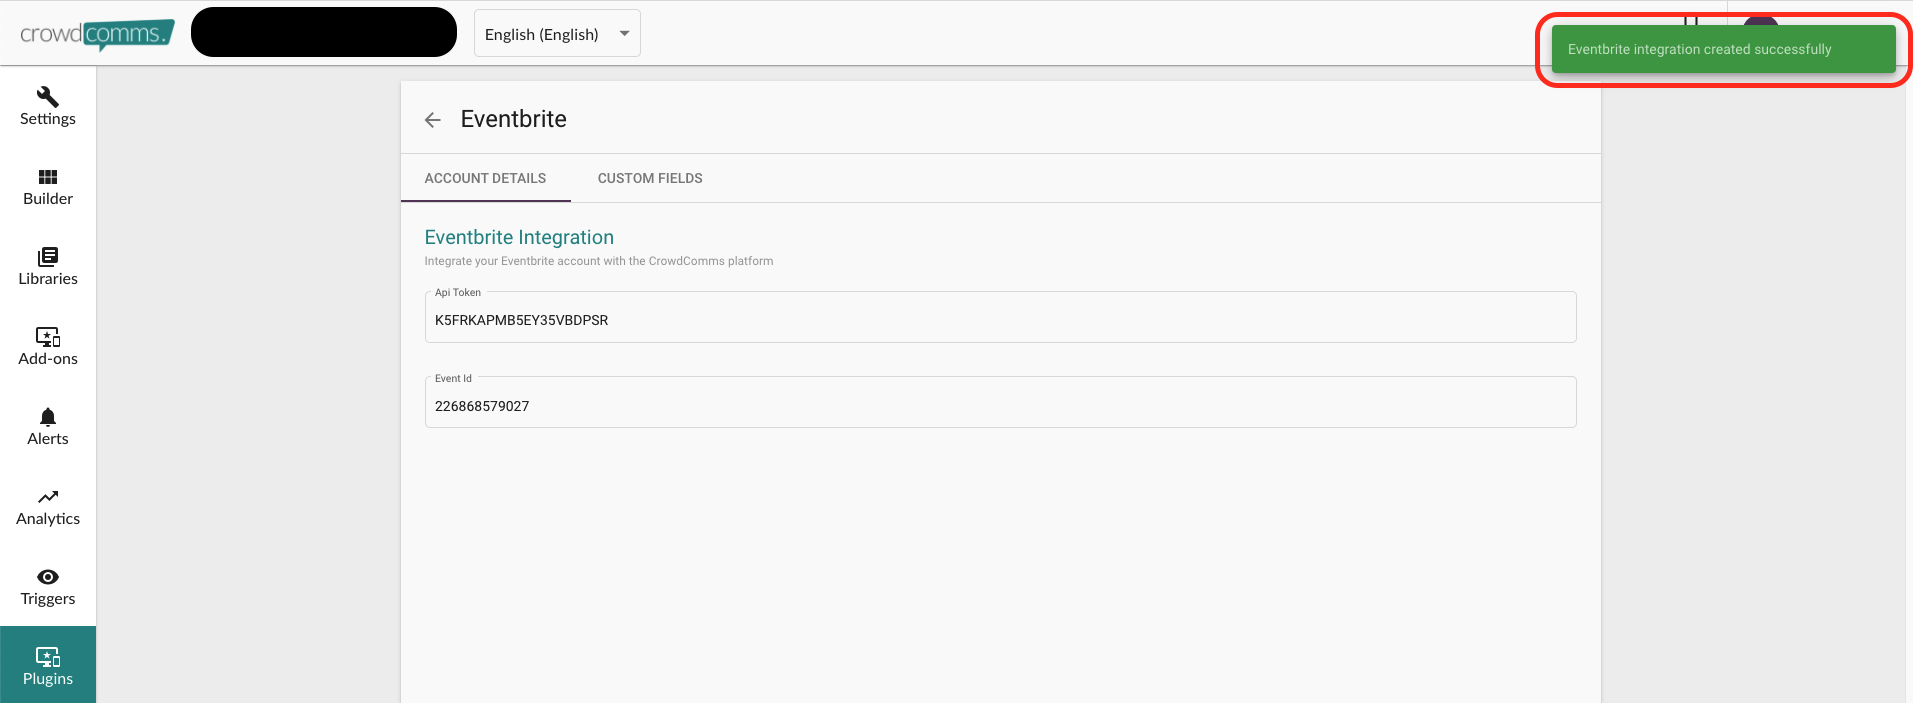
3.6 There are two ways to check for a successful integration:
(a) On CrowdComms dashboard (CMS)
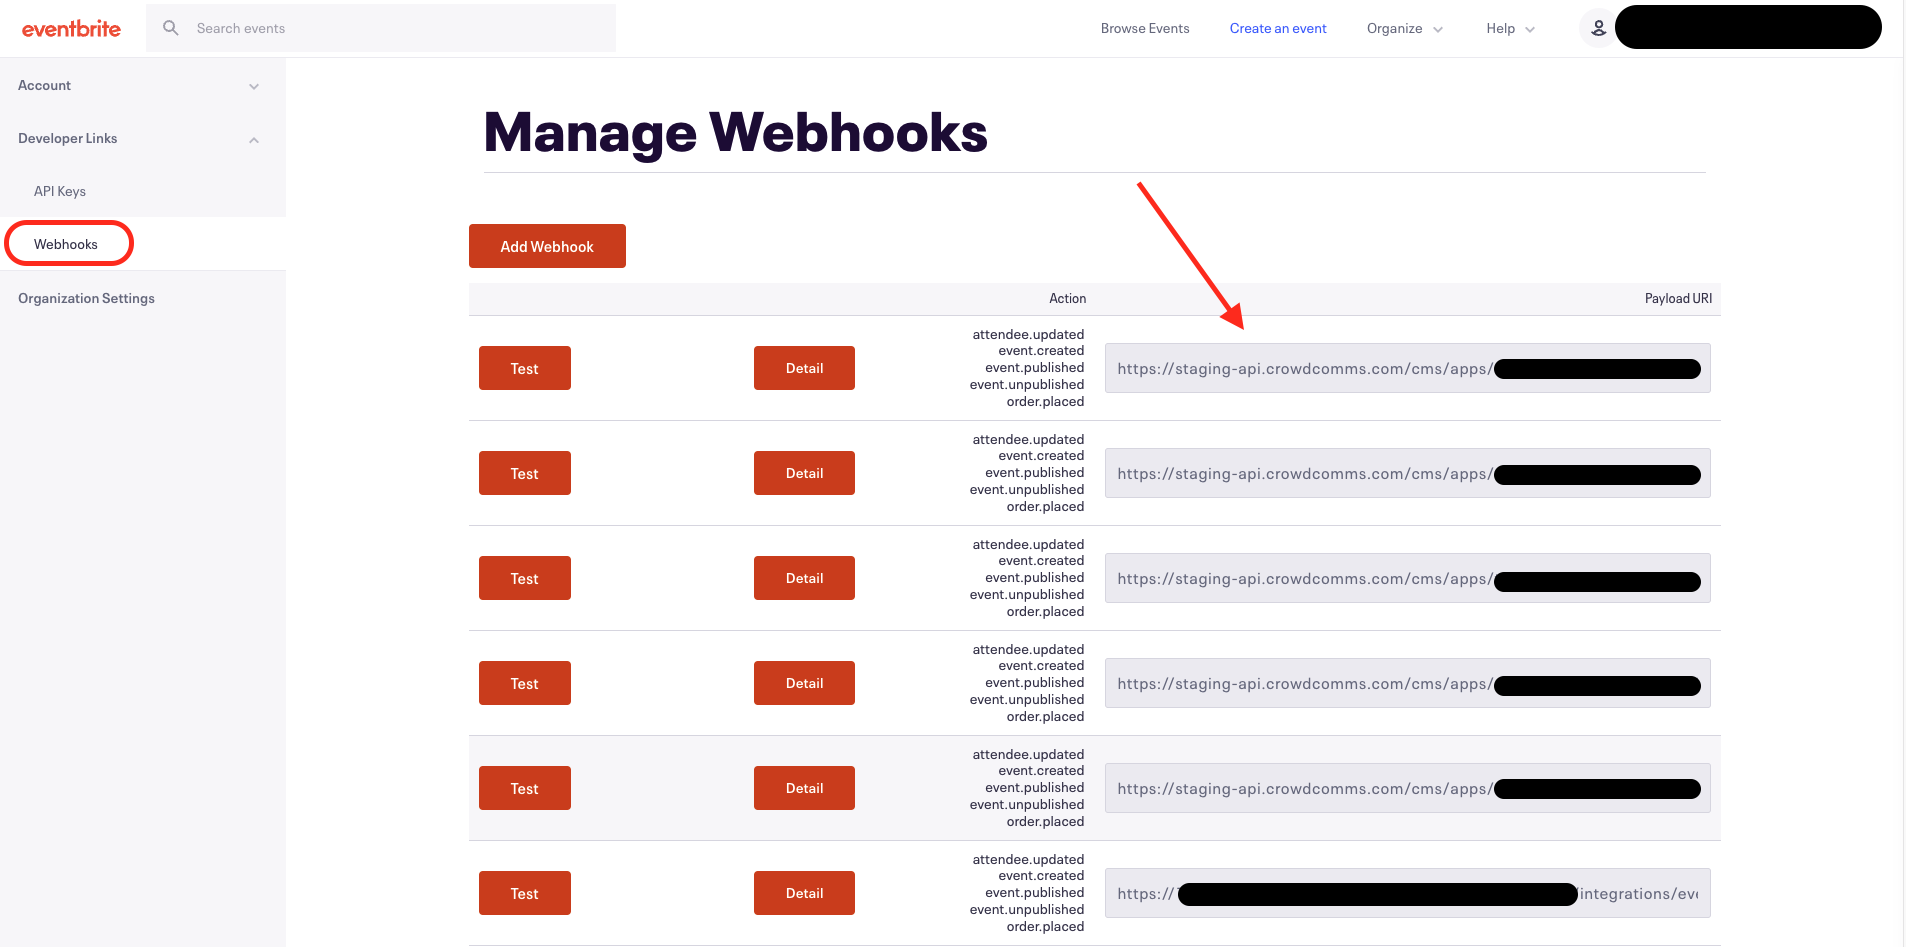
(b) On Eventbrite platform (Account Settings > Developer Links > Webhooks)
The new integration will have created a webhook and you can identify which webhook is yours by finding the app shortcode in the webhook link
4. Custom Fields
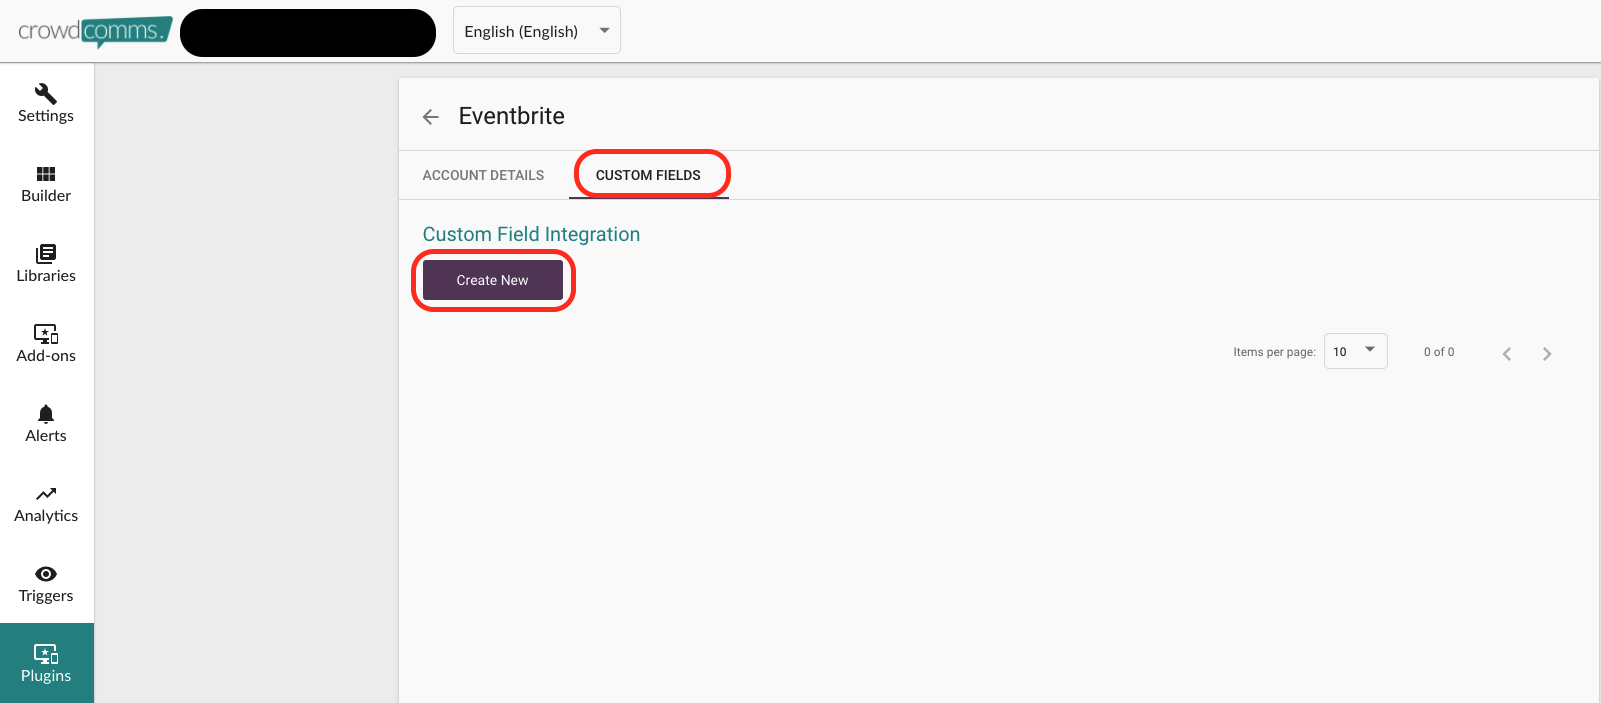
4.1 Click on the “Custom Fields” tab in CrowdComms dashboard (CMS)
4.2 Click “Create New”
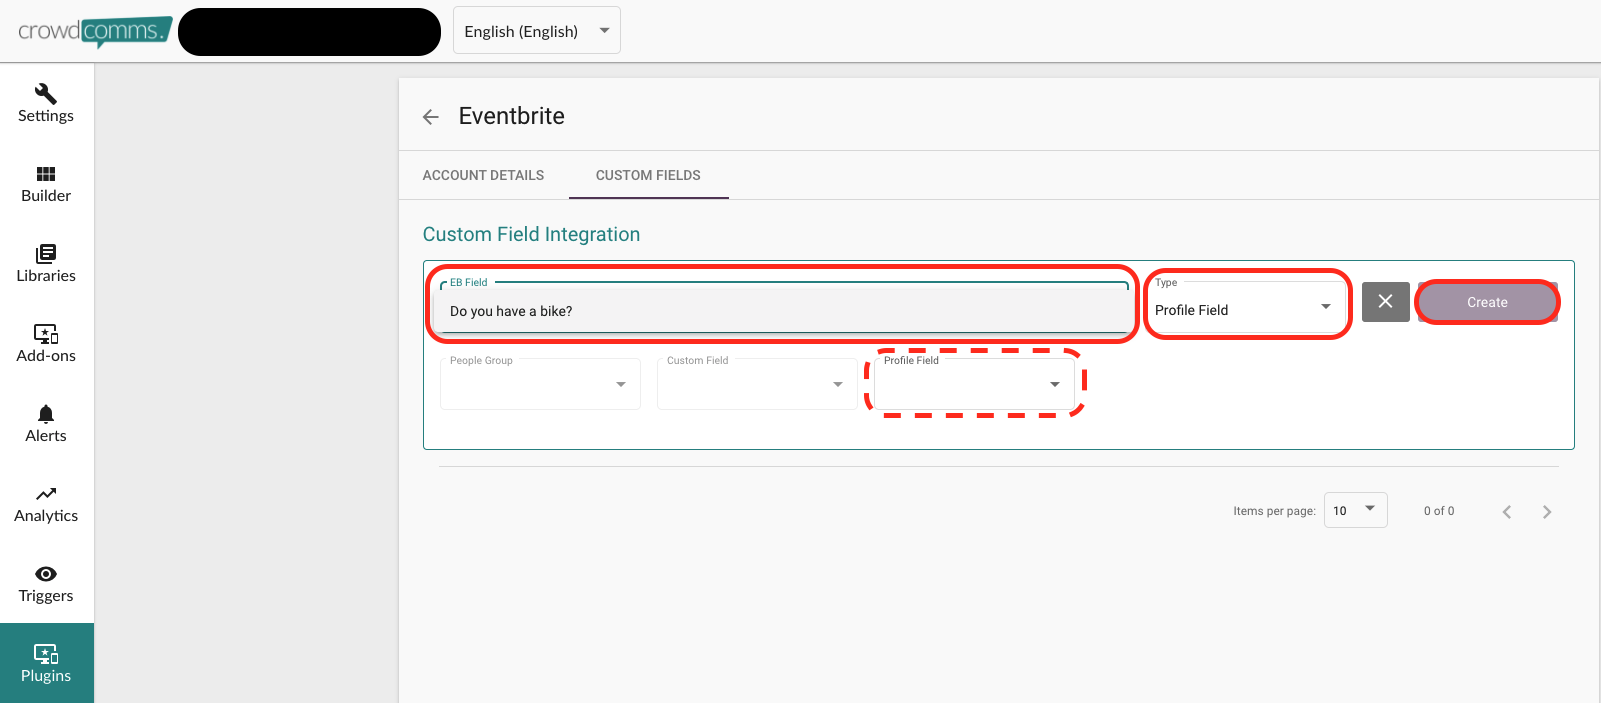
4.3 If you have added custom fields on your Eventbrite event, these custom fields will appear on the drop-down of the “EB field” field on CrowdComms dashboard (CMS).
4.4 You can also map additional delegate's profile information from Eventbrite using this field. For example: Job Title, Company etc.
4.5 You can map your Eventbrite custom field by selecting the Type field to map to CrowdComms:
(a) People Group
(b) Custom Field
(c) Profile Field
4.6 Based on the Type that you select, only the selected field will be available, and the other two will be unavailable
4.7 Click “Create”
**Useful tips**
- When you create the integration, pre-existing attendees on Eventbrite event will not sync into CrowdComms dashboard (CMS). So please ensure you create the integration prior to registrations on Eventbrite starting.
- ONLY the delegate’s First name, Surname and Email are automatically synced through to CrowdComms dashboard (CMS), all other information needs to be set up using Custom fields mapping.
- You can add as many custom fields as you wish, as long as the fields in Eventbrite are also Custom fields.
- Eventbrite Custom field can only be linked to a CrowdComms Custom field or a Person Field.
- Syncs from Eventbrite to CrowdComms dashboard (CMS) are instantaneous.
Eventbrite doesn't send CrowdComms Deletions, so if you have removed any users from Eventbrite, you will also need to remove them manually from the CrowdComms platform.

